
You can schedule any message to send at a later date. You can also schedule the message to recur every day, a specific day of the week or month. After you create a message, you can click the Schedule for later checkbox at the bottom of the Post New Message page to schedule it.
Here is how you schedule the message:
-
Create the message as required with recipients, delivery methods, sender profile and message content. See the topic Send Messages to create a message.
-
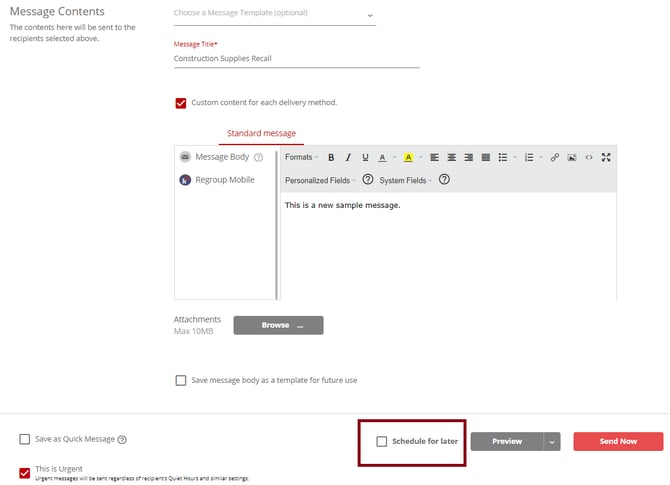
Scroll to the bottom of the Post New Message page and click the Schedule for later checkbox.
See the following image:
The schedule for later pop-up opens.
-
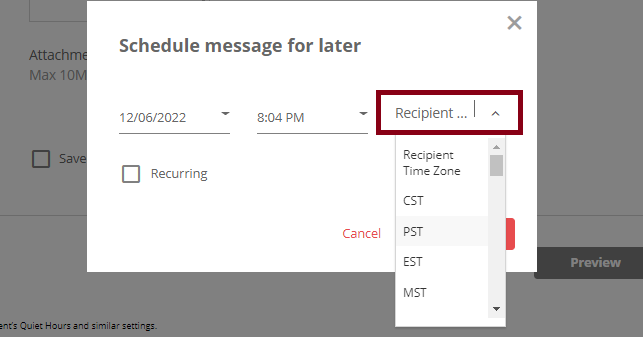
In the Schedule Message for Later dialog, use the Select Date field to choose the date on which the message should be sent.
-
In the Select Time field, specify the exact time at which the message should be sent on the selected date. Select a time zone in the dropdown next to it.
-
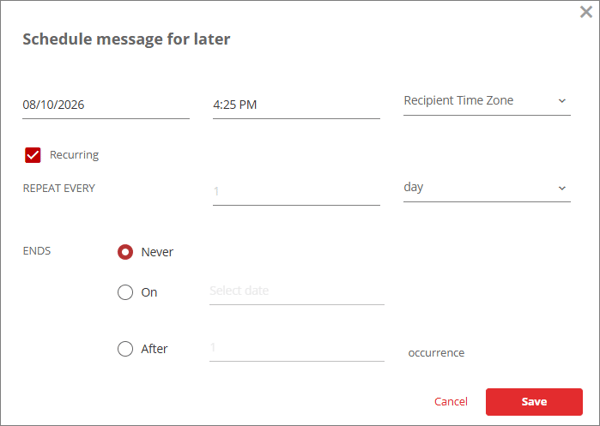
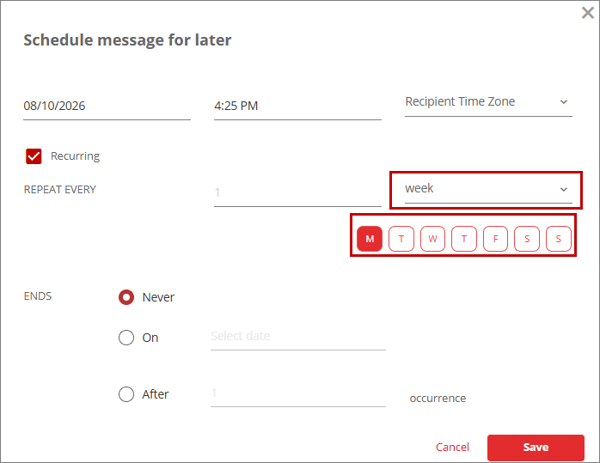
Optionally, select the Recurring option to schedule the message to be sent repeatedly at a specified interval rather than as a one-time message. On selecting the “Recurring” option, the following options will appear:
-
Repeat Every: Specifies how frequently the incident should repeat (e.g., every 1 day, week, etc.). Enter the interval and unit. For example, to repeat the incident every 2 days, set the interval to 2 and select “day” as the unit.
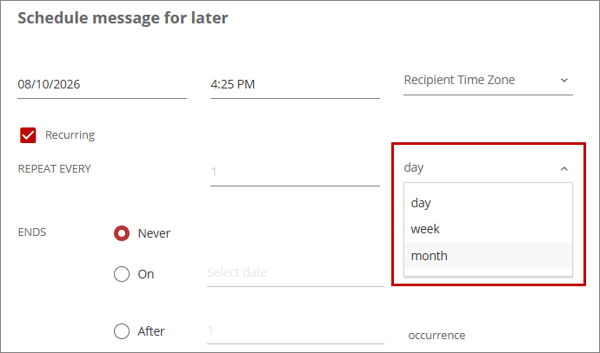
The available units are:
-
Day: Sends the message at the specified day interval.
Week: When this option is selected, the days of the week (Monday through Sunday) are displayed. Select one or more days on which the message should be sent.
-
Month: When this option is selected, the following monthly scheduling options are displayed:
-
Specific Days: Schedules the message based on the occurrence of a weekday within the month. On selecting this option, two dropdown lists are displayed. The first dropdown lets you select the occurrence (for example, First, Second, Third, Fourth, or Fifth). The second dropdown lets you select the weekday (for example, Monday, Tuesday, etc.). By default, one occurrence–weekday combination is available and cannot be removed. You can add up to five occurrence–weekday combinations by clicking the Add Another button. For example, First Monday and Third Friday).
-
Specific Dates: Lets you specify one or more calendar dates within the month on which the message should be sent.
-
-
-
End: Specifies when the recurring message schedule ends. The available options are:
-
Never: Select this option to continue sending the message indefinitely, with no end date.
-
On: Select this option to stop sending the recurring message on a specific date. Once selected, choose the date on which message delivery should end.
-
After: Select this option to stop sending the recurring message after a specified number of occurrences. Once selected, enter the number of times the message should be sent before the schedule ends. For example, enter 3 to send the message three times.
-
-
-
Click Save.
-
Click Schedule to confirm.
You get a confirmation message confirming sending the message. You can find the scheduled messages in the Scheduled Messages tab.