
With group automation, you enable the system to create groups with the custom attribute filter values and combinations you create. The system scans contact profiles and adds contacts with the selected attribute values into a new group. You can scan contacts from groups or the entire organization.
Here is how you create group automation:
-
Click the Organization Settings icon in the top right corner. See the following image:
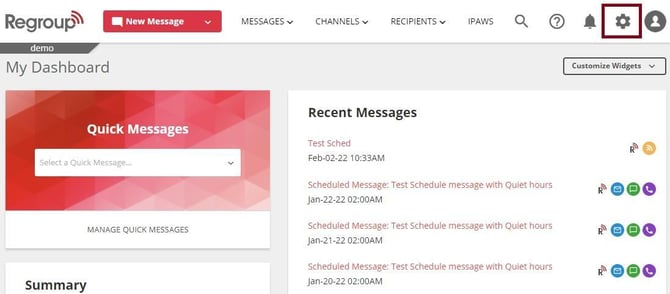
The Organization Settings page appears.
-
Click the Group Management segment on the left navigation panel. See the following image:
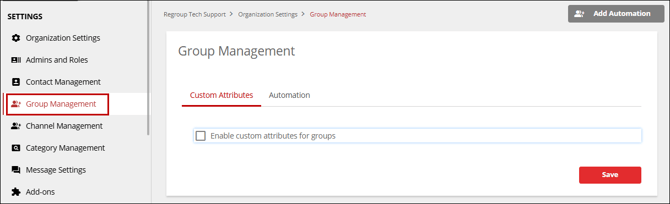
The Groups page opens with existing groups created with custom filters.
-
Click Add Automation in the top right corner. See the following image:
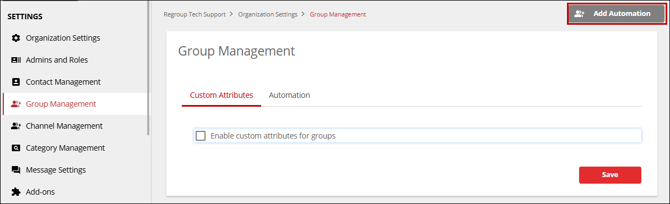
The Group Automation page opens.
-
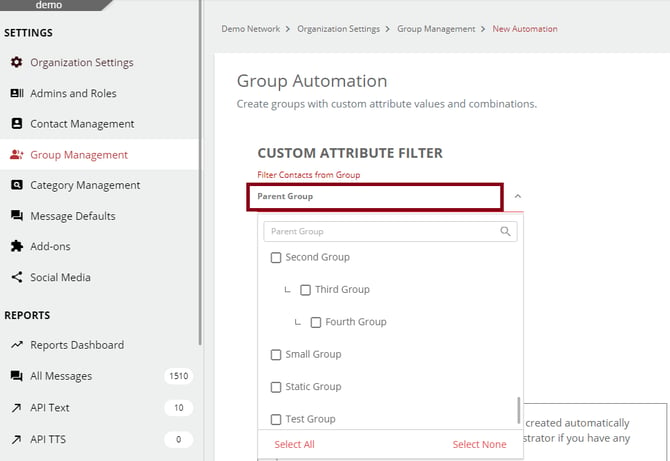
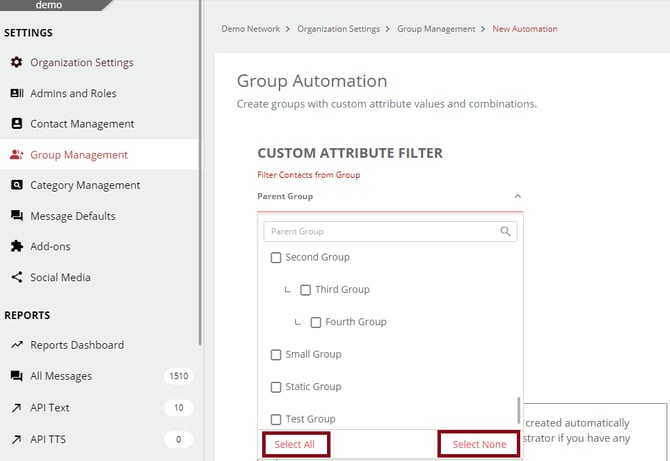
Click the Parent Group drop-down to select the groups from which the system should filter contacts into new groups. See the following image:
-
You can also click Select All or Select None at the bottom of the drop-down to select or deselect groups.
Tip: When you click Select All, the system filters through all groups and floating contacts in the organization.
See the following image:
-
In the Filters section, click the Filed Name drop-down to select the attributes you want to filter contacts to new groups. See the following image:
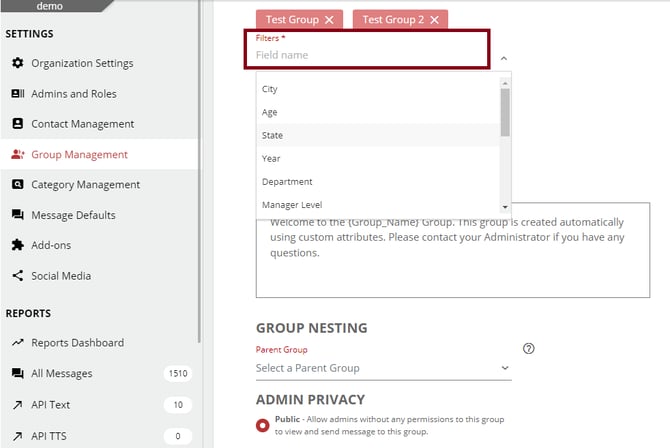
When the automation is saved, the system filters and adds all contact with the selected attribute value into a new group.
-
Click the Add an AND Condition button to add more filters in combination with the previously selected field. See the following image:
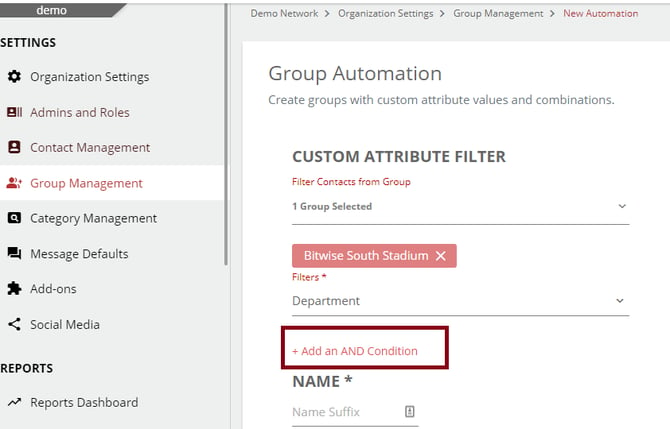
Tip: Let’s say you choose Department as the first filter and Parent as the second. The system creates a group for each department and adds all parents to the respective groups.
-
In the Name field, you can add Name Suffix to the three-part group name the system creates for automated groups. See the following image:
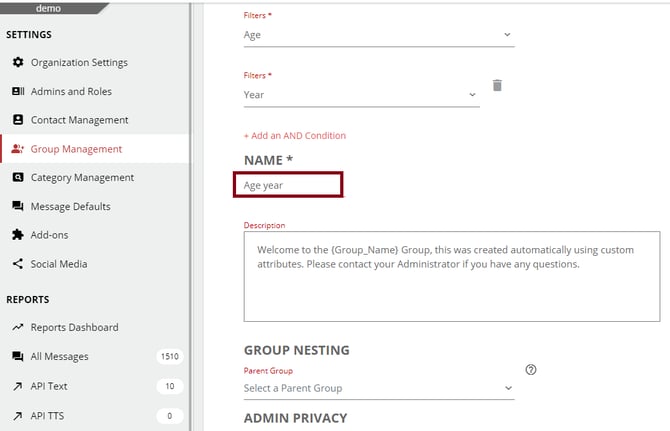
Tip: The three parts of the group name are the value of the attribute, the name of the attribute and a suffix of your choice. The formula for the group name is {AttributeValue1} {AttributeValue2}{Name of the attribute} {NameSuffix}.
-
Update the Description as required. This is the message that a new contact receives when they are added to a group.
-
In the Group Nesting section, click and select a group from the Select Parent Group drop-down list. The newly created groups come hierarchically nested under the selected parent group. See the following image:
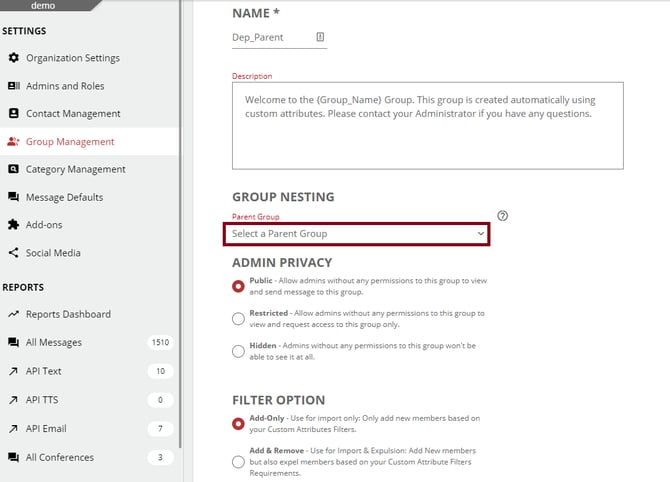
Tip: Nesting all the automated groups under a parent makes group management easy. You can apply a single setting to all the nested groups.
-
Select Admin Privacy from the three following options:
-
Public: All admins can view and send messages to the newly created group without any approval.
-
Restricted: All admins can view and request access to this group.
-
Hidden: Admins without any permission to this group cannot see this group.
-
-
Select one Filter Option to determine how contacts should be added to the newly created groups.
-
Add-Only: Use for import only: Only add new members based on the custom attributes filters.
-
Add & Remove: Use for Import & Expulsion: Add New members, but expel them if they don't have the required custom attribute filters in their profile.
Tip: You can remove previously created groups by updating the custom attribute filters and enabling the Add and Remove filter option.
The filter option determines how contacts are added or removed in the newly created groups. After the group creation, the group membership update depends on the group-level custom attribute filter. To set up group-level custom attributes, see the topic: Manage Group Membership Using Custom Attributes Filter.
-
-
Select a Schedule Settings option to set the frequency of group automation. The following are the options:
-
One Time - This import will never repeat itself automatically.
-
Daily - Sync members daily between 8 pm - 5 am US Eastern Time.
-
Weekly - Sync members weekly between 8 pm - 5 am US Eastern Time.
-
Monthly - Sync members monthly between 8 pm - 5 am US Eastern Time.
Note: To update group membership at a specific interval, set the custom attribute filter with the required frequency at the group level. See the topic: Manage Group Membership Using Custom Attributes Filter.
-
-
Click Save.
You have now created custom-based new group automation for your organization.