
The organization admins can enable the web sign-up page, allowing users to subscribe to the communication channels in your organization.
Here is how you enable and customize the sign-up page for your organization:
-
Click the Organization Settings icon in the top right corner. See the following image:
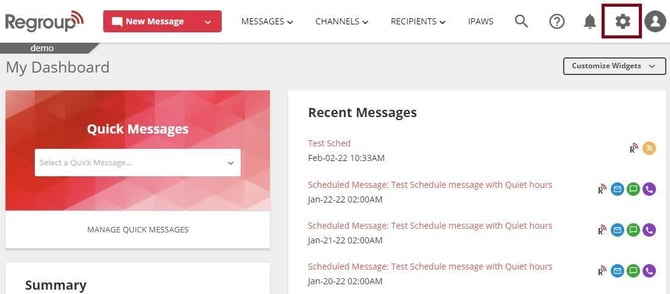
The Organization Settings page opens with the General tab.
-
Click the Organization Sign-Up tab. See the following image:
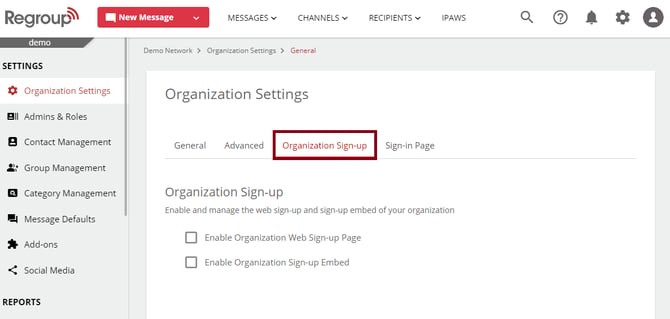
-
Click to enable the Enable Organization Web Sign-up Page checkbox.
See the following image:
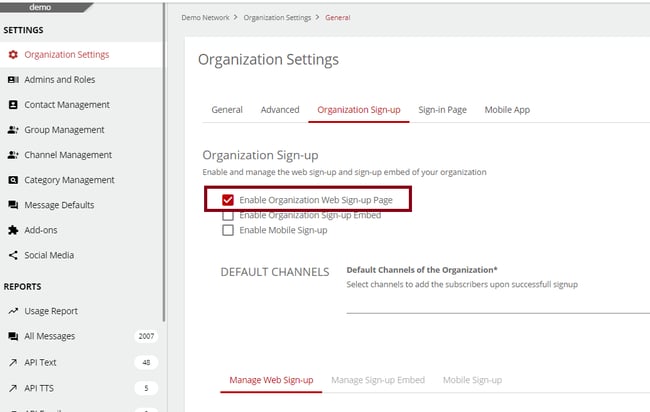
The sign-up page setup section opens.
Note: Multiple tabs appear on the Organization Sign-Up page if other signup checkboxes are enabled. You must click each applicable tab to configure them and save each tab individually to save your changes.
To set up a sign-up embed, see the topic, Set Up Organization Sign-up Embed.
-
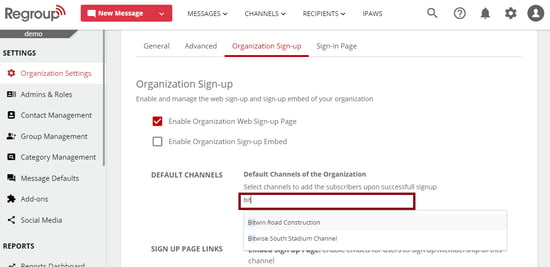
In the Default Channels section, search and select a public channel the sign-in user must subscribe to. Selecting a default channel is mandatory. However, if you want to enable users to select at least one mandatory channel of their choice from a list of channels you provide, use the Subscription Option at the bottom of this page. If you are using that option, you can use a dummy channel as the Default Channel because it becomes hidden on the Sign Up page.
See the following image:
Tip: After the user signs in, they can unsubscribe from the channels if the channel settings allow it.
-
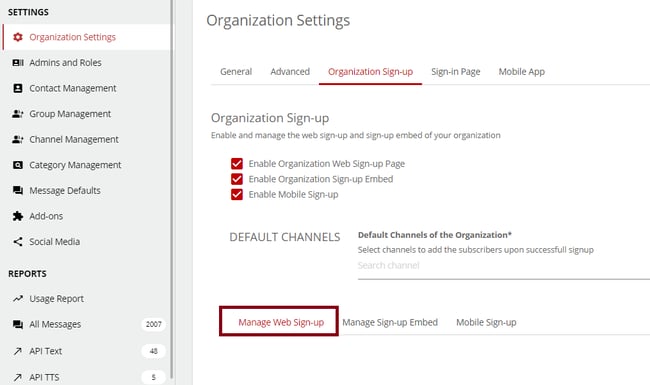
If you have other signup checkboxes enabled, click Manage Web Sign-up tab. See the following image:
-
In the Sign-Up Page URL section, you can enable either of the following:
-
Use the default sign-up for your organization: Enabled by default. Click Copy Link to use the web sign-up URL with default settings.
-
Customize the sign-up page for your organization: Enable this to customize the Title and Description of the sign-up page. Click Copy Link to host the customized sign-up page.
-
-
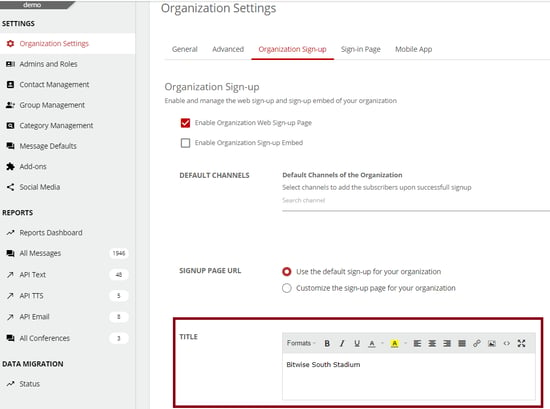
Enter the page title in the Title section. See the following image:
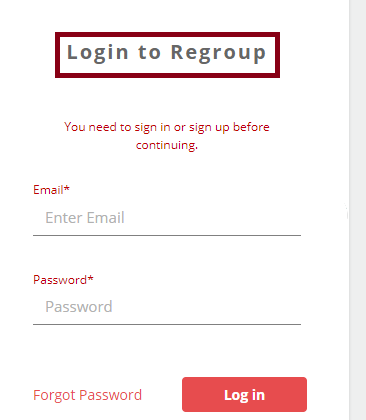
See the following image on how it appears for the contact:
-
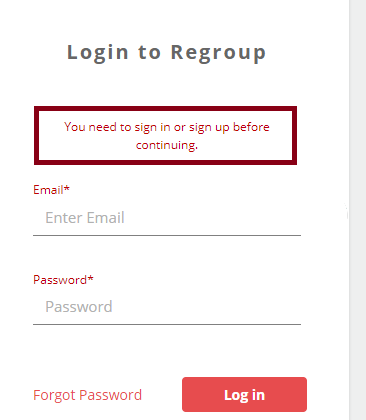
In the Description section, enter the description for your organization’s log-in page. See the following image on how it appears for the contact:
-
In Account Set Up, you can customize the fields on the Account Setup page:
-
For each custom field, click to edit the Field Label and Place Holder Text. Users input data in the selected fields when they sign in.
Tip: The field label appears as the title of the field. The placeholder text appears inside the text field where users enter information.
See the following image:
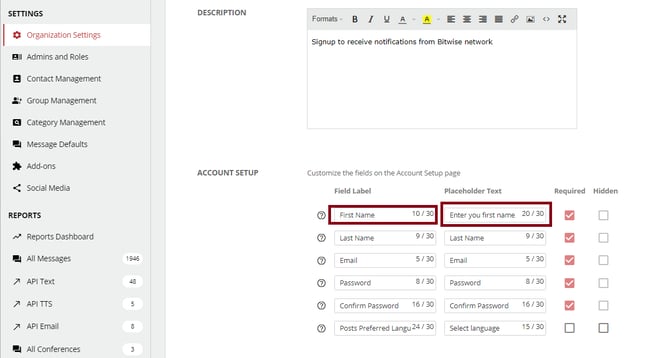
- Click the Required checkbox to mandate the field on the sign-up page.
-
Click the Hidden checkboxes to hide the fields on the sign-up page.
Tip: If neither of the boxes is selected, the field appears on the sign-up page as a non-mandatory item.
Note: You must enable the Auto Translation add-on and the Post Translation checkbox to let contacts choose their preferred language while signing up.
-
-
In the Personal Information section:
-
Click the Field Label and Placeholder Text field for Username, primary address and Database ID to edit them. See the following image:
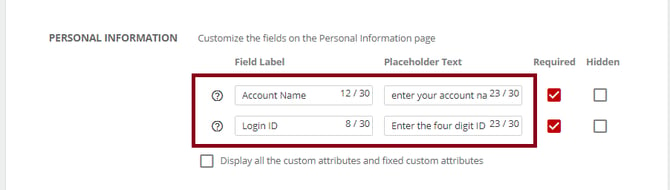
- Click the Required checkbox to mandate the field on the sign-up page.
-
Click the Hidden checkboxes to hide the fields on the sign-up page.
Tip: If neither of the boxes is selected, the field appears on the sign-up page as a non-mandatory item.
-
-
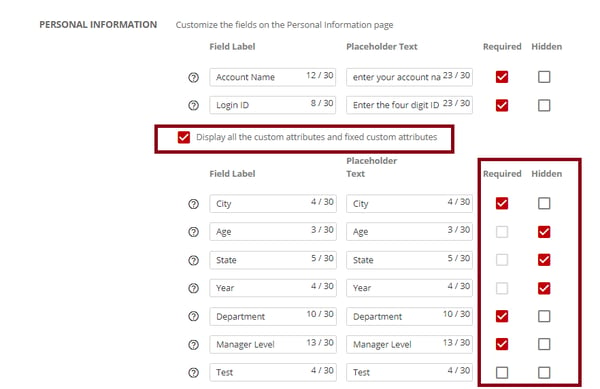
Click the Display all the custom attributes and fixed custom attributes checkbox to view and add more attributes from all the available attributes.
-
You can click the Field Label and Placeholder Text to edit them.
-
Click the Required checkbox to show an attribute on the sign-up page.
-
Click the Hidden checkboxes to hide them on the sign-up page.
Tip: If neither of the boxes is selected, the field appears on the sign-up page as a non-mandatory item.
See the following image:
-
-
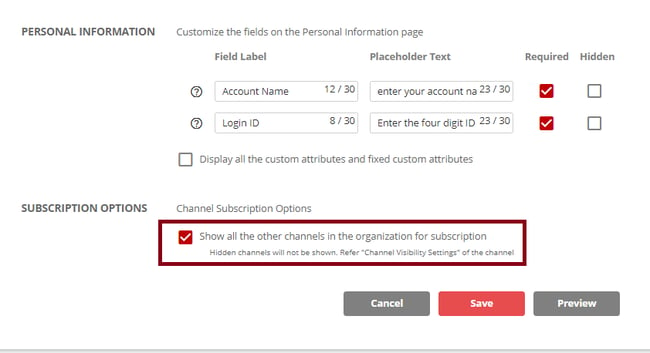
In the Subscription Options section, click the Show all the other channels in the organization for subscription checkbox to list available channels for subscription on the sign-up page.
Tip: The channels set as hidden in the privacy settings will not be visible for the subscription.
See the following image:
-
Click Save.
-
You can click Preview to view how the page looks when implemented.
Note: If you select more than one sign-up option checkbox, you must individually save changes in each tab.