
You can create channels in the channels tab. When creating channels manually, you can create only one channel at a time.
Here is how you create a channel:
-
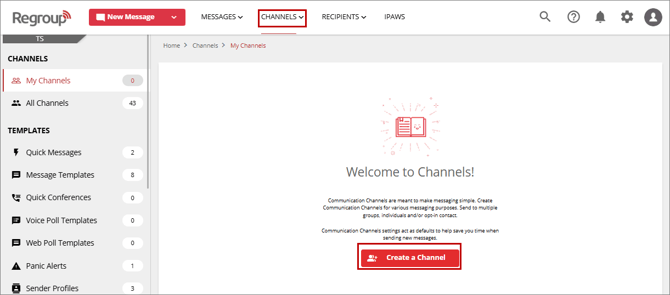
Click the Channels tab. See the following image:
-
Click Create a Channels button.
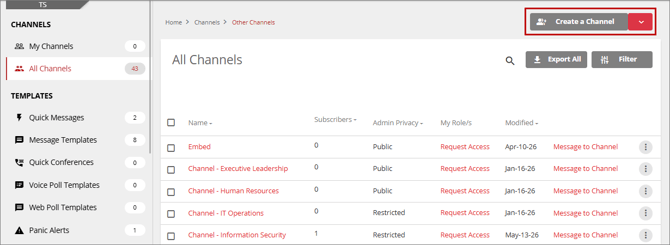
The create channel button appears on the top right corner of the My Channels and All Channels pages if you have created other channels.
See the following image:
-
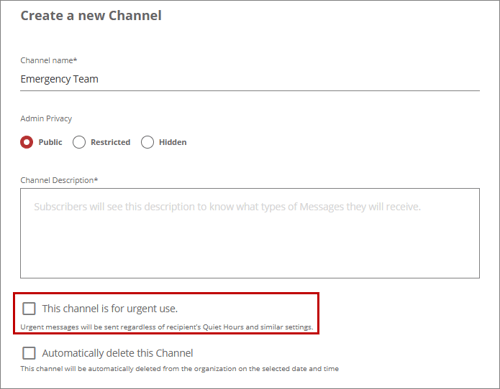
Enter a channel name in the Name field.
-
Select Admin Privacy from the following options. Admin Privacy determines who can access the channel.
-
Public - Allow all admins to view and send messages to this channel.
-
Restricted - Allow all admins to view and request access to this channel.
-
Hidden - Allow only admins with access to this channel to view or send messages to this channel. Other admins cannot see this channel.
-
-
Enter a description for the channel in the Channel Description field.
-
Click and enable the This Channel is for Urgency Use checkbox to prioritize all the messages sent from this channel. The system sends urgent messages quickly. See the following image:
-
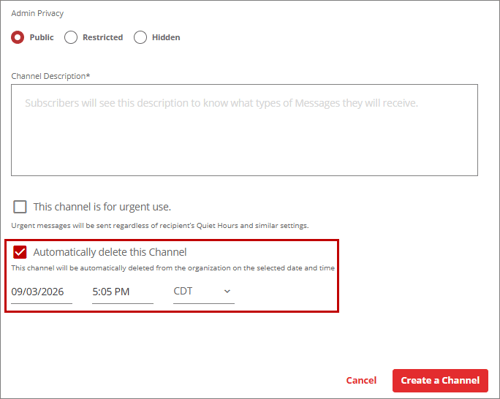
If you are creating the channel for a limited period, click Automatically delete this Channel checkbox. Select a date and time when the system must delete the channel.
See the following image:
-
Click Create a Channel.
You get a message confirming the creation of the channel.
The General Settings page for the newly created channel opens.
Note: You can copy the Token ID to manage RSS feeds and the channel ID while importing channels or sending messages using API.
-
Scroll down to the Channel Type section. Select either of the following two options to determine whether the system should receive replies from this channel's recipients.
-
Announcements Only: The system does not receive replies from this channel's recipients using Email, SMS, or Mobile apps, and admins cannot view or manage them.
Tip: When messaging an Announcement-Only channel, you could mention that your organization does not receive the recipient’s replies in the message body.
-
Open Discussion – The system will receive the replies from the channel's recipients and can be viewed and managed by the admins.
See the following image:
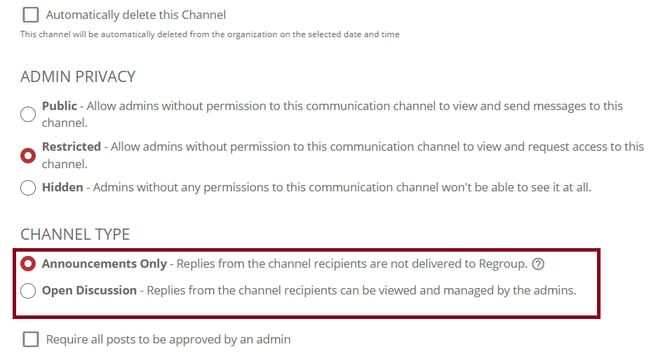
If you select Open Discussion, you can display replies on the Replies tab of the Sent Messages page, and you can forward them to channel admins, the message sender, and all channel recipients. Otherwise, you can send them to a custom email without displaying them on the Replies tab.
Here is how you set it up:
-
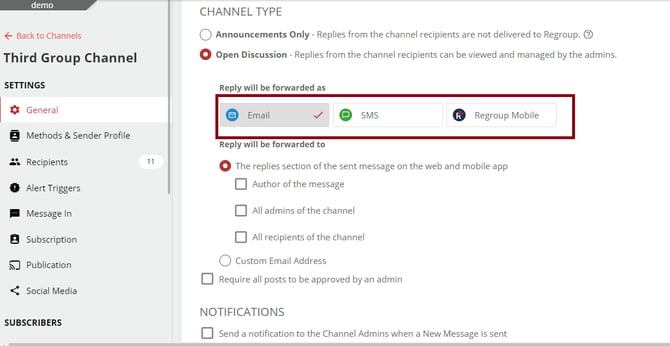
From the Reply will be forwarded as section, select a delivery method the system should use to forward the replies.
See the following image:
-
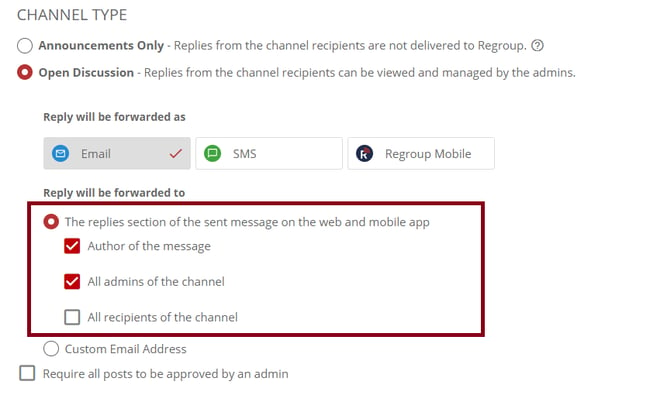
In the Reply will be forwarded to section, you can select an option from the following to forward the replies:
-
The replies section of the sent message on the web and mobile app: Selected by default, this option enables the system to display all messages in the Replies tab of the Sent Messages page along with the facility to forward the replies.
If you need to forward the relies besides displaying them on the Replies tab, click one or more of the following checkboxes:
-
Author of the message: The system forwards the replies to the admin who authored and sent the message.
-
All admins of the channel: The system forwards replies to the admin of the channel from which the message is sent.
-
All recipients of the channel: The system forwards the replies to all channel recipients using the delivery method you chose above.
See the following image:
-
-
Custom Email Address: You can enter a custom email address to which the system should forward all replies. This option will not display replies in the Replies tab.
See the following image:

-
-
-
-
Click Require all posts to be approved by an admin checkbox to assign an admin to approve all messages sent from this channel.
-
Click the Notification checkbox to notify the channel admins when any admin sends a new message.
-
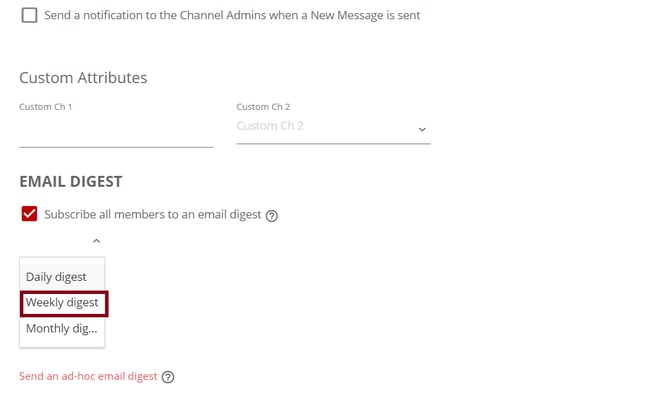
To send a digest email to channel recipients, summarising all messages sent from your organization:
-
Click Email Digest
-
Click the dropdown to select the frequency at which the digest must be sent.
See the following image:
-
You can click Send an ad-hoc email digest to send an email digest immediately to recipients who have chosen to receive a daily digest in their profile. They also receive the regular digest at their chosen time.
-
-
Click Save Settings.
You get a message confirming the channel update.