
You can create sender profiles for your organization from the New Sender Profile page. Admins can use these profiles while sending messages or set one as the default for specific channels or the organization.
Admins can access the New Sender Profile page while sending messages, configuring channels, or setting up the organization.
You can access the New Sender Profile page when:
-
Sending a message
-
Configuring a channel
-
Setting up the organization
How to create a Sender Profile
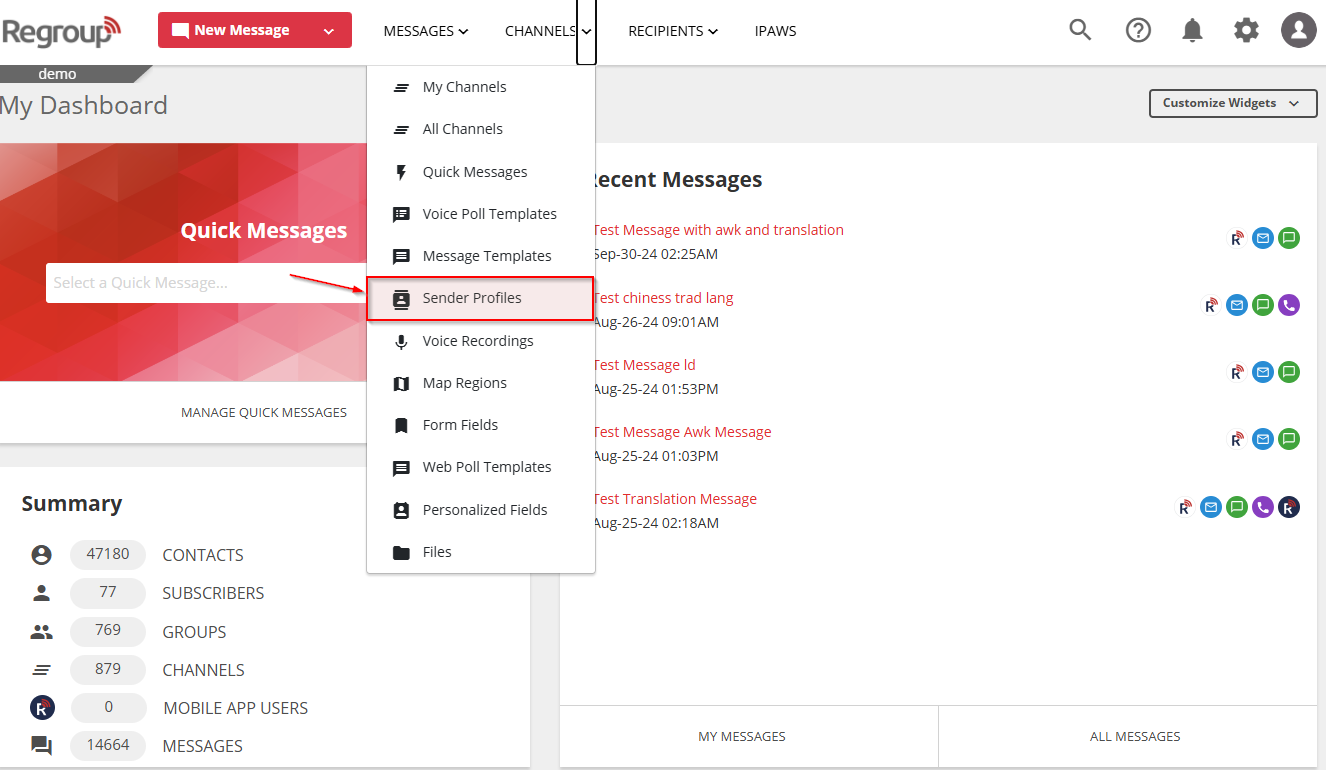
1. Click the Channels dropdown and select Sender Profile.
1.2. To create a new sender profile, click the +New Sender Profile button.
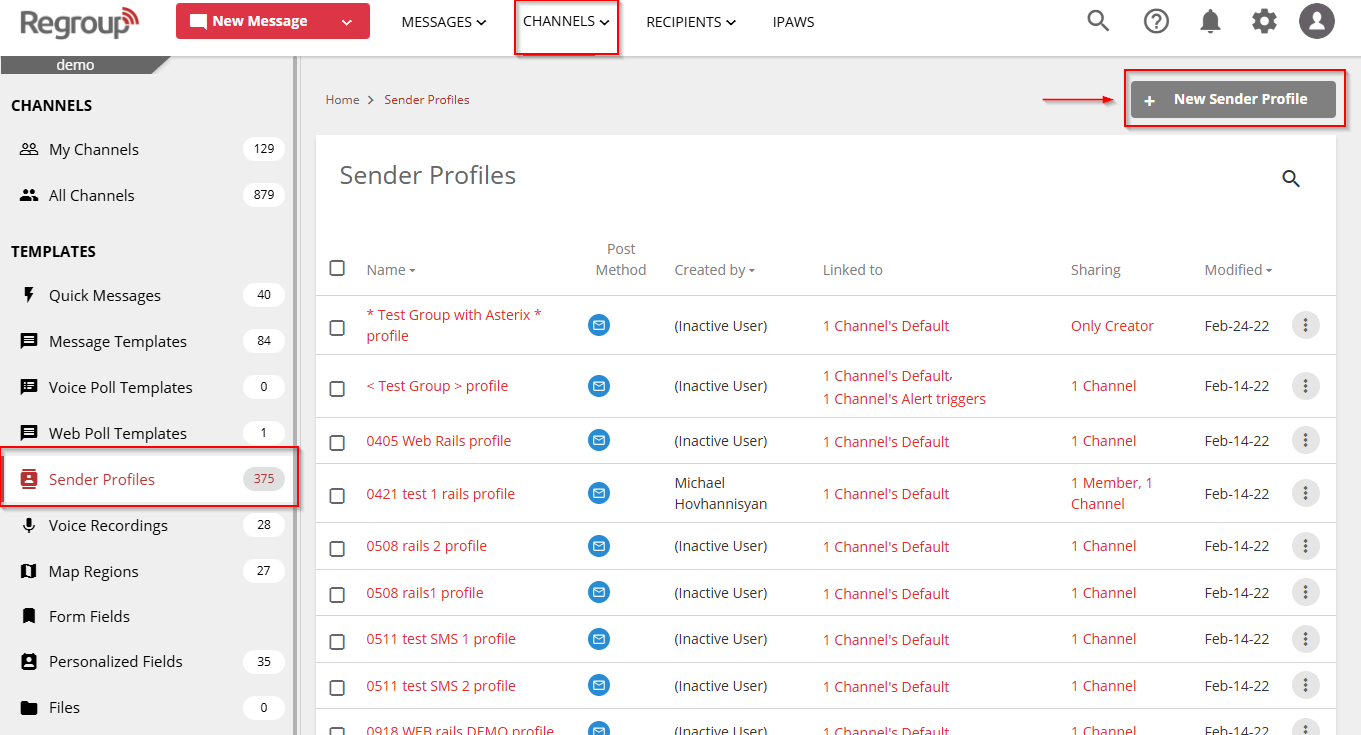
The New Sender Profile page opens.
Fill in the required information
2. Enter a Sender Profile Name — choose a name that helps you recognize the profile’s purpose when selecting it during message sending.
2.1 In the Sender Information section, specify the sender details that recipients will see when messages are delivered. Select from one of the following options:
-
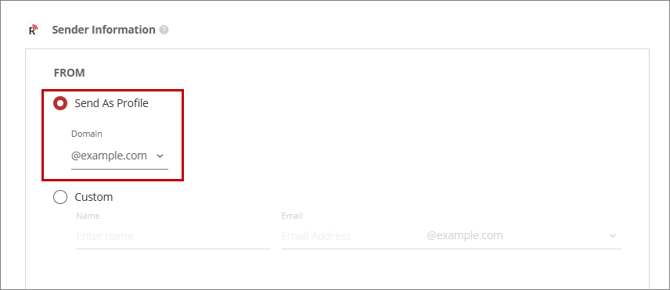
Send as profile: Select this option to use the channel or group’s name and email address as the sender details in the notification email. All emails are sent using an authenticated domain configured in the admin portal.
-
If your organization has a single authenticated domain, it is applied automatically.
-
If multiple authenticated domains are available, a dropdown list is provided for you to select the desired domain.
The email address format is:
-
-
Custom: Select this option to define custom sender details for notification emails. When this option is selected, you have to specify the following parameters:
-
Name: Specify the display name that will appear as the sender in the notification email.
-
Email: Specify the sender email address to be used for notifications. You only need to enter the portion of the email address before the “@” symbol. The domain part is automatically populated based on the authenticated domain(s) configured in the admin portal.
-
If your organization has one authenticated domain, it is applied automatically.
-
If your organization has multiple authenticated domains, a dropdown list is displayed, allowing you to select the desired domain.
-
-
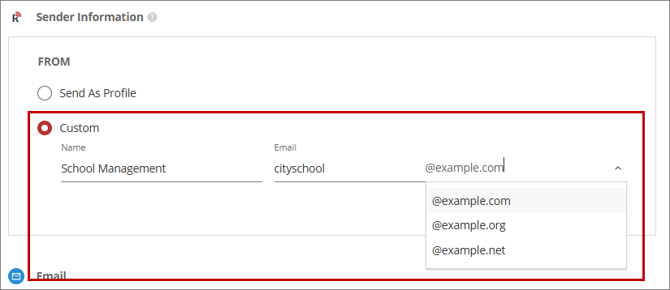
Tip: Use the Custom From address to display your organization’s name and email ID for easier identification.
Email Settings
Configure Email, SMS, and Voice Settings for a Sender Profile
3. In the Email section, configure how the email appears to the recipient:
3.1 Reply-To Field
-
Reply-To field: Choose how to receive recipient email replies:
-
Replies are sent to the author of the message: Replies go to the email ID of the admin who sent the message.
-
Reply to Profile: Replies are received in the Replies tab of the sent message on the channel or group messages page.
-
Use a custom reply-to email address: Enter a custom email address to receive replies.
-
Tip: Set up a "do not reply" address, such as do-not-reply@YourOrganization.com, if you do not expect replies.
Important: Ensure that you whitelist Regroup’s email servers and update your SPF record for custom addresses. If not, emails may be flagged as spam.
For the most up-to-date IP addresses and SPF configuration, refer to the Server Allow List for Regroup Email Servers.
3.2 Subject Prefix
Choose if you want a prefix added to the beginning of your email subject line:
-
Use the default prefix: [organization NAME]: — prefixes the message subject with the organization, channel, or group name.
-
Do not use a prefix: No prefix is added.
-
Use a custom prefix: Enter custom prefix text in the provided field.
Tip: If at least one channel is in the recipient list, the first channel’s name appears as the default prefix. The group name becomes the default prefix if the recipient is a group or a combination of groups and individuals. For individual recipients, the system displays the organization’s name.
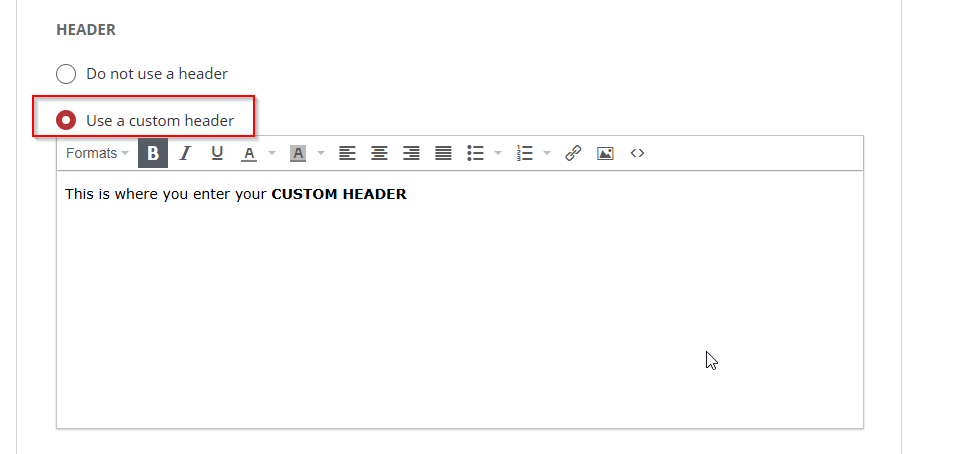
3.3 Header
Choose if you want a prefix added to the beginning of your email subject line:
In the Header section, choose whether your message should include a header:
-
Do not Use a Header
-
Use a Custom Header: If selected, enter the custom header text in the provided field.
3.4 Footer
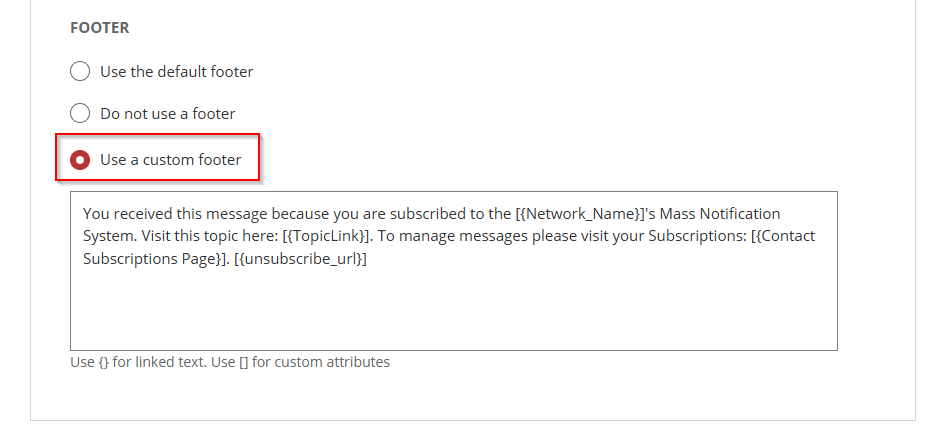
Customize the text that appears at the end of your emails:
-
Use the default footer: The default footer includes an unsubscribe URL, allowing users to unsubscribe from the channel or group. Note that if the group or channel settings do not permit unsubscribing, the link will not be included.
-
Do not use a footer: No footer appears in messages.
-
Use a custom footer: Enter custom footer text in the provided field. You can include variable fields such as [Group Name], [Channel Name], [Recipient Name], and [Recipient Email]. These placeholders will populate dynamically when sending messages.
Note: Using variable fields may impact email delivery speed.
SMS/Text Settings
4. Enable SMS Prefix:
-
Check the box to turn on a custom prefix for SMS messages.
-
Enter your desired prefix text.
Note: SMS messages are limited to 160 characters.
When a prefix is enabled, the character count updates automatically to reflect the available characters after the prefix.
Call (TTS/Voice) Settings
5. Set how voice calls appear when sent:
-
Enter the name you want to display as the caller in the Caller Name field.
-
Enter the phone number in the Caller ID field.
-
Voice Profile: Click the dropdown to select a voice for Text-to-Speech (TTS) calls from a variety of male and female voice options.
-
Click the Play button to preview available voices.
For detailed instructions, see the topic: Send Voice Messages
Share the Sender Profile
6. Determine who can use the sender profile:
-
Only Me: You are the only user who can access this profile.
-
All Admins: Share the profile with all organization admins.
Optionally, allow others to Modify or Delete the profile.
-
Select Groups, Channels, or Individual Admins:
Select specific groups, channels, or individual admins to share access.
You can grant Modify and Delete permissions as needed.
Final Step: Click Create
7. You have now successfully created and shared a sender profile, and shared it with the selected admins, groups, or channels!