
Here is how you create voice recordings:
-
Click the Channels dropdown and select Voice Recordings. See the following image:
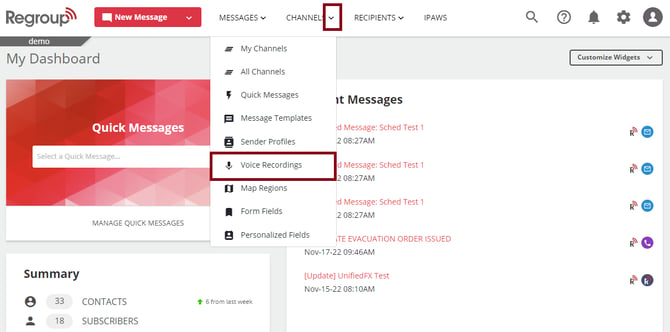
You can also click the Channels tab, then click Voice Recording under the Templates section on the left navigation panel.
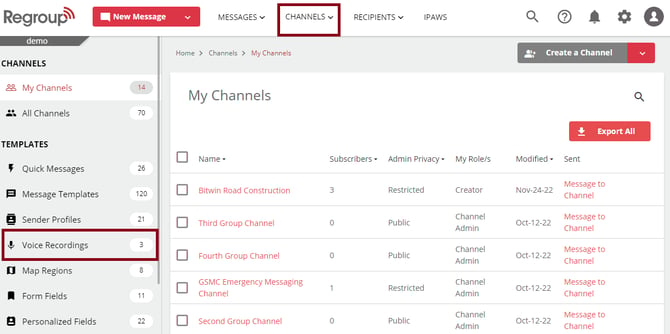
The Voice Recordings page opens with a list of all the available recordings.
-
Click + New Voice Recording button on the top right corner. See the following image:

The New Voice Recording page pops up. You can either upload a prerecorded voice record or record your voice by enabling the system to call you.
-
To record voice over the call:
-
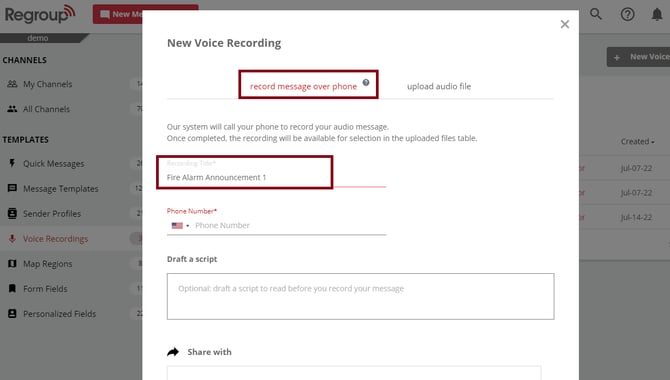
The Record Message Over Phone tab opens by default. Otherwise, click it open.
-
Enter the title for the recording in the Title field. See the following image:
-
Enter a phone number in the Phone Number field. The system calls this number to record the voice.
-
Enter a script in the Draft a Script field if you need to read it out when the system calls you.
-
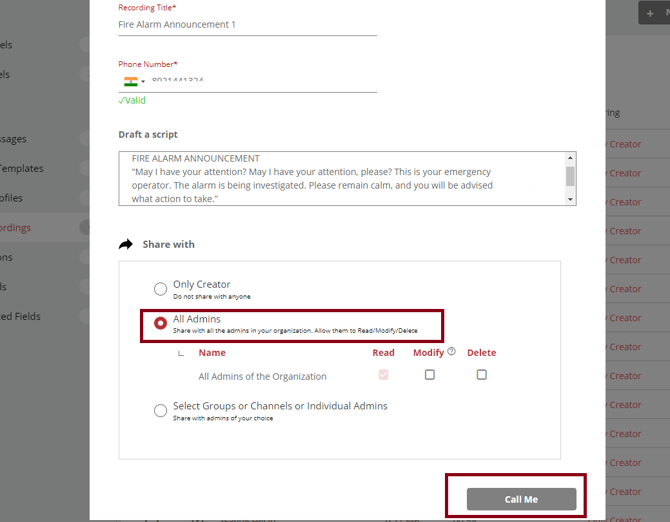
Click one of the following radio buttons to determine who can access, modify or delete the voice clip:
-
Only Creator: Only the creator of this message can access this template.
-
All admins: Share with all the admins in your organization. You can also select their permissions.
-
Select Groups or Channels or Individual Admins: Share with the admins of your choice.
See the following image:
-
-
Click Call Me to get a call from the system to record your voice.
Note: When recording the message using the Call Me option, you cannot record the voice for longer than 5 minutes.
-
Click Ok to confirm the system to call you.
When you receive the call, the system instructs you to record your voice.
-
Wait a few seconds before you start recording.
-
Click pound (#) to stop recording.
After the recording, you can listen to the voice.
-
Click 1 to confirm the recording.
-
Click 2 to rerecord the message.
When you confirm the recording, the recording gets listed on the Voice Recordings page.
-
-
To upload an audio file:
-
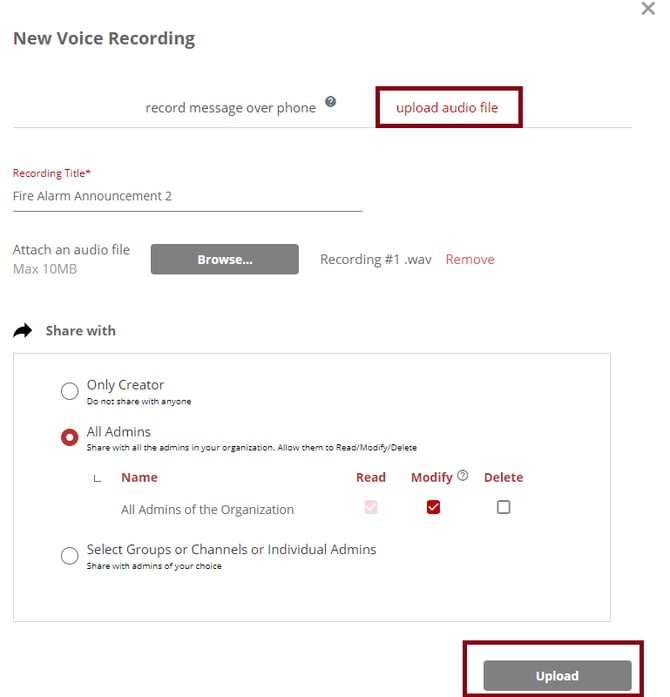
Click the Upload Audio File tab.
-
Enter the recording name.
-
Click Browse to upload the file from your computer.
-
Click one of the following radio buttons to determine who can access, modify or delete the voice clip:
-
Only Creator: Only the creator of this message can access this template.
-
All admins: Share with all the admins in your organization. You can also select their permissions.
-
Select Groups or Channels or Individual Admins: Share with the admins of your choice.
-
-
-
Click Upload. See the following image:
A message confirms the creation of the new voice recording.
You can click the Play
 button on the Voice recording page to listen to the recordings.