
Use this method to add multiple new contacts to a group. For example, large organizations with complicated department structures can use this method. You can first download the CSV file to understand the CSV format. You can also update the downloaded CSV with your data and import it. Even if your CSV doesn’t have the correct structure, you can always adjust it in the MAP YOUR DATA section.
Note: The processing style regulates the group membership import. For more information, see the topic, Configure Processing Styles for Import.
Here is how you download the sample CSV, upload the updated one with a list of contacts and map your data:
-
Click the Recipients tab. See the following image:
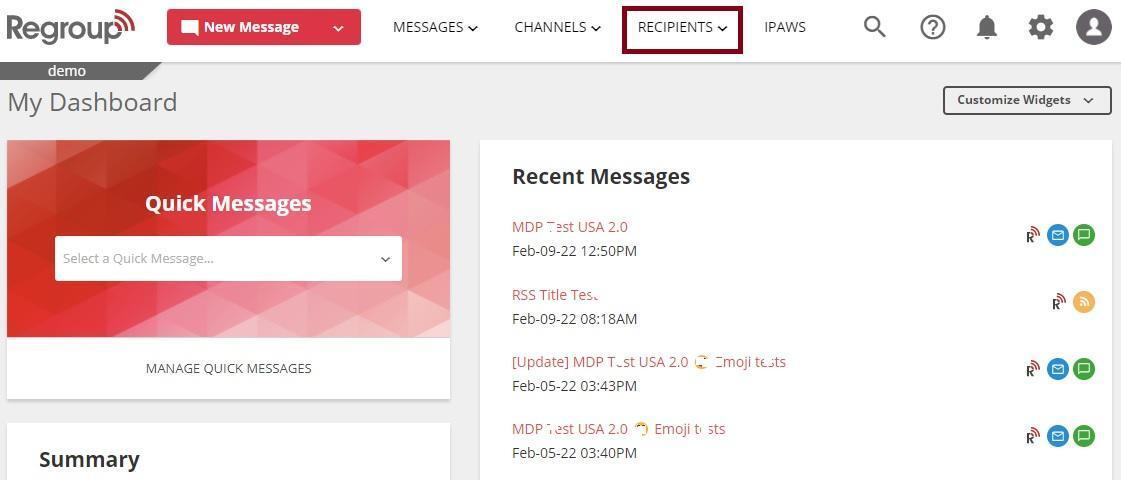
The My Groups page appears.
-
Search and locate the group to add the contacts in the My Groups tab. Organization admins can add contacts to the groups on the All Groups tab.
-
Click the group name and open it. Otherwise, click Edit Group from the vertical ellipsis.
See the following image:
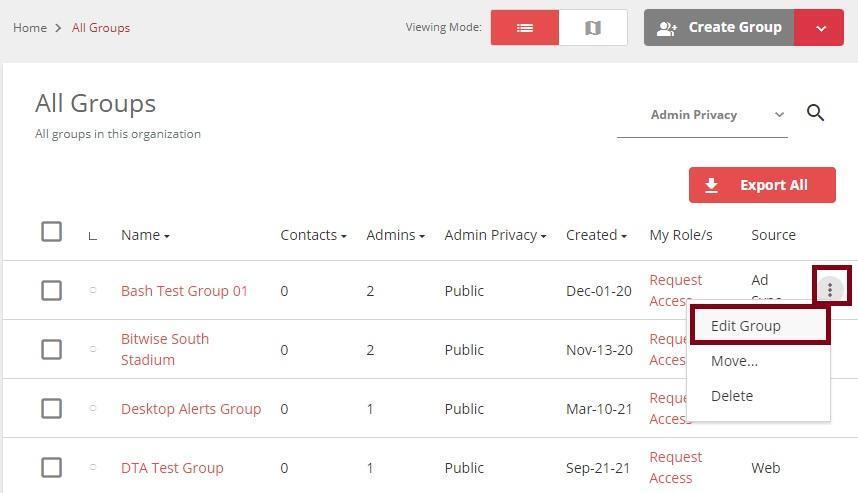
The Group Settings page opens.
-
Scroll down to the Group Members section on the left navigation panel and click Import & Add Contacts. See the following image:
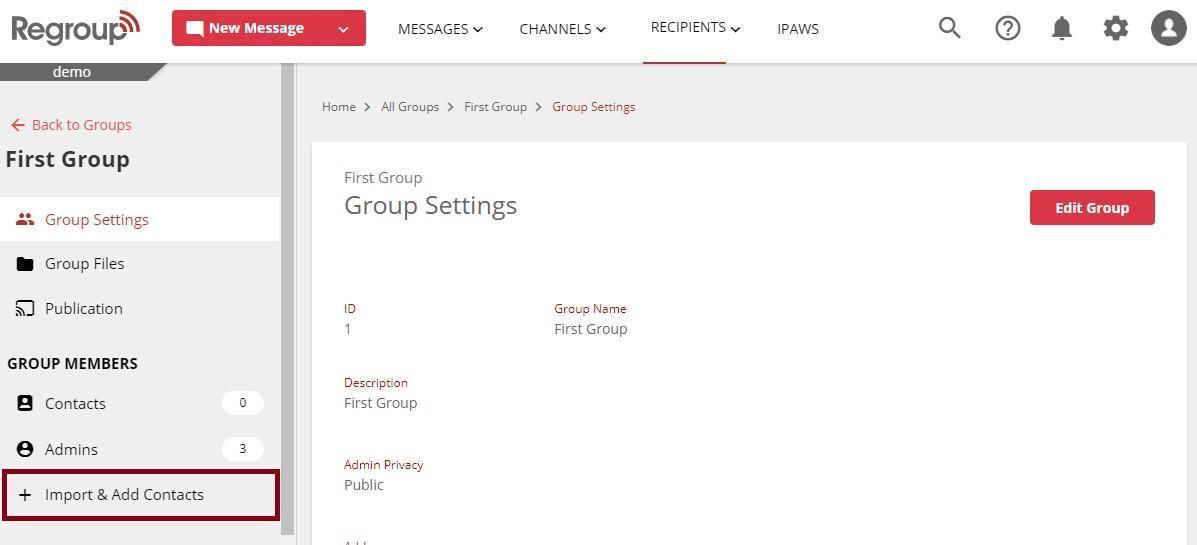
The Add Contacts page appears.
-
Click Import Contact from CSV File. See the following image:
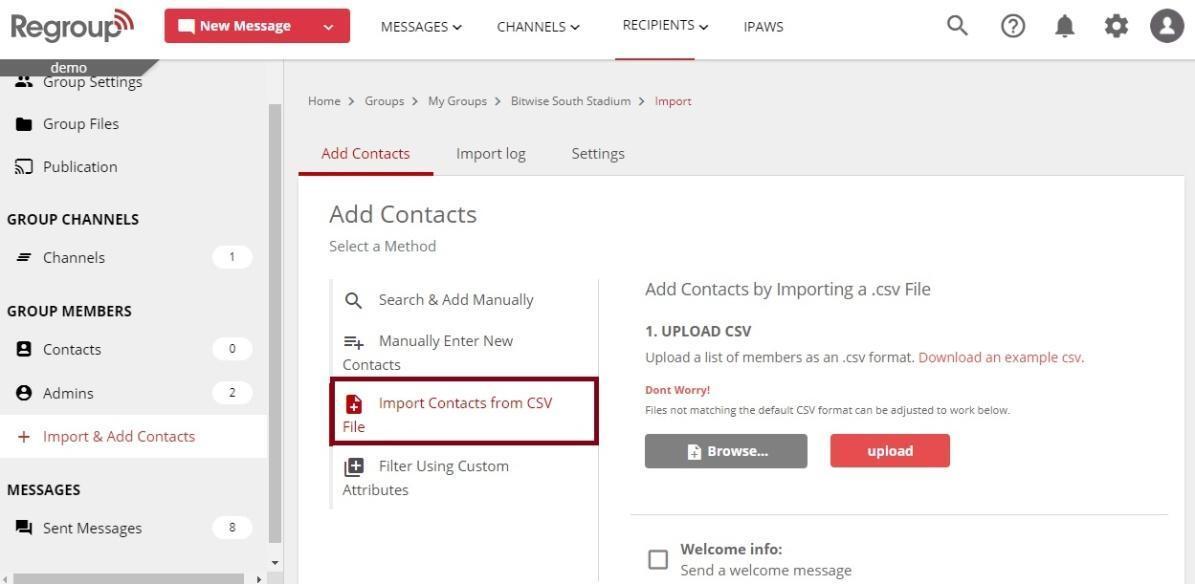
-
Click Download an example CSV. to download the sample CSV.
See the following image:
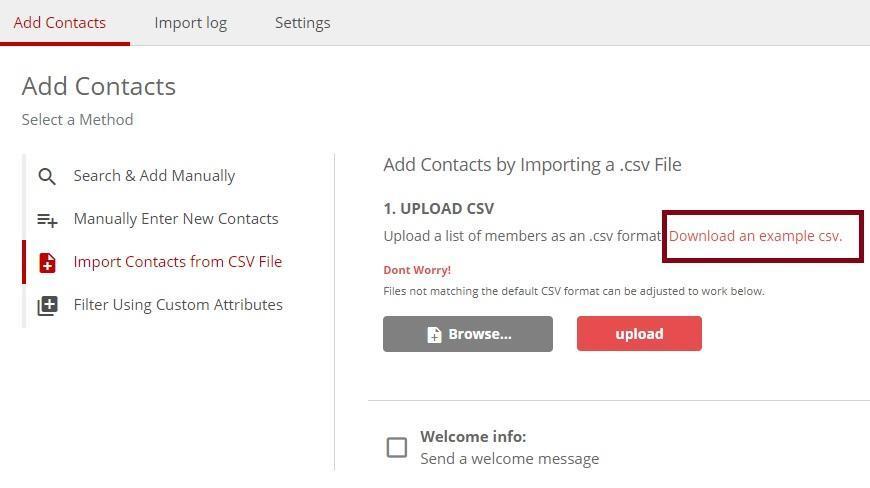
A sample CSV gets downloaded to your system. Use the downloaded CSV to populate the list of recipients and attributes.
Note: If you have a CSV file with a different order from the downloaded sample CSV, you can map the attribute correctly after uploading your CSV.
-
Click Browse to select and open the updated CSV from your computer.
-
Click Upload.
The data you uploaded in your CSV gets populated in the Map Your Data section.
-
You can click Remove to remove the uploaded CSV.
-
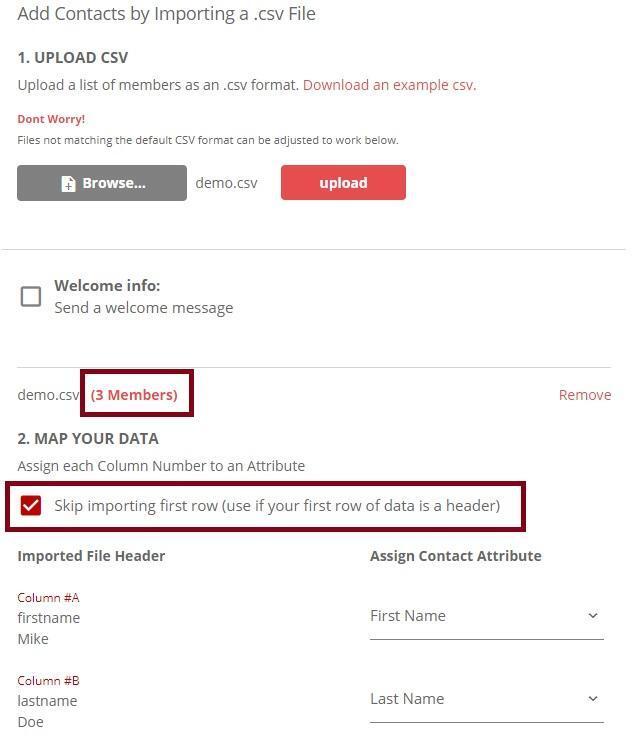
You can verify the number of members recognized by the system.
The following image highlights the number of members and the skip importing the first-row checkbox:
-
If the first row on your CSV file is a header, click and enable Skip importing the first-row checkbox. This prevents importing the values in the first row as a recipient. By default, this option is enabled.
Note: Mapping is done by matching the fields in your CSV with the database fields of the application.
-
To map, click the Assign Contact Attribute (database fields) drop-down and select the correct attribute that suits the Imported File Header (CSV fields) column values.
Note: If you cannot find a custom attribute here, you must go to the Custom Attribute tab of Contact Management and add the attributes.
-
Click Add Contacts.
A message appears confirming how many recipients were successfully added and other details.