
You can add contacts to a channel based on their location. This feature uses the address in a contact’s or admin’s profile to identify and target them geographically. To ensure accurate targeting, keep profile addresses up to date (see Update Admin Profile and Update Contact Profile).
Add Recipients from a Map
-
Open the Channels tab to view the My Channels page.
-
Click the channel name to open its General Settings page.
-
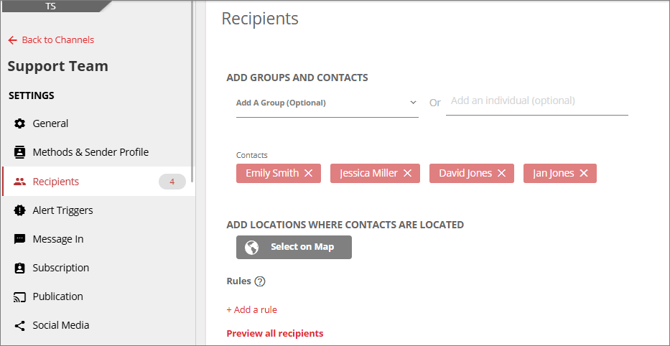
Open the channel and select the Recipients tab.
-
Click Select on Map to open the map tool.
-
Choose a location in one of two ways:
-
-
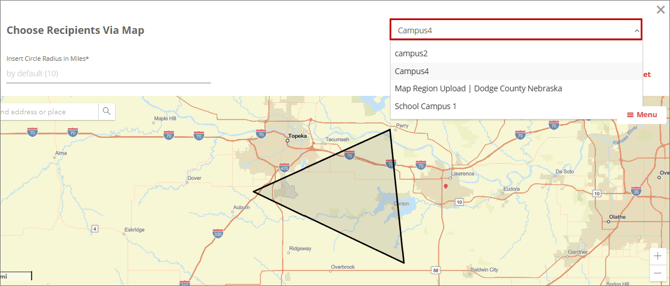
Select Saved Location: Use the Select Map field to pick a previously saved map region (see Setup Map Region).
-
-
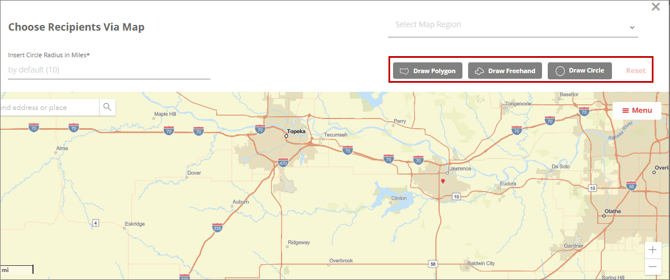
Draw a New Location:
-
-
Find Address or Place: Search for a location to center the map.
-
Draw Polygon: Click points to outline the desired area.
-
Draw Freehand: Hold and drag to sketch the shape.
-
Draw Circle: Enter a radius (miles) and click the map to set the center.
-
Use Reset to start over.
-
-
Review the list of contacts in the selected area.
-
(Optional) To filter contacts by group, you must first select a saved location or draw a new location on the map.
-
Select or deselect contacts as needed, then click Select Recipient.
-
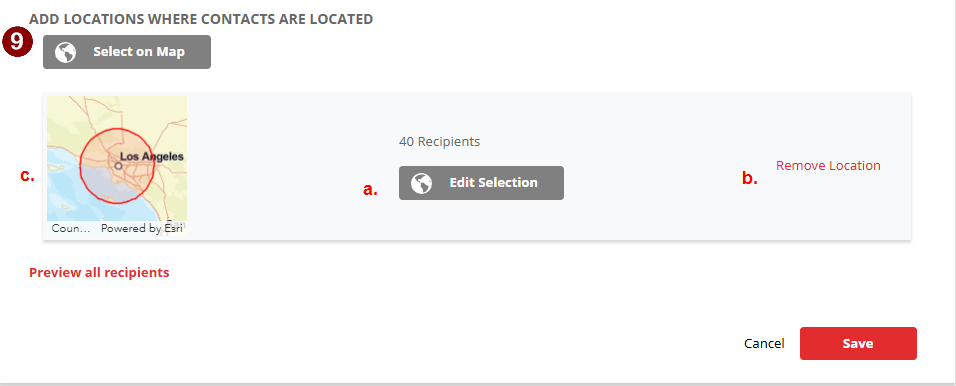
The map location is added to the Recipients page. From here, you can:
-
-
Edit Selection to change the area.
-
Remove Location to delete it.
-
Preview All Recipients to see the selected contacts.
-
-
Save your changes.
Additional Notes
-
View the map location used for recipient selection on the Message Details page of sent messages. Click highlighted recipients on the map to locate them.
For accurate geo-targeting, ensure contact and admin addresses are updated. Refer to Update Admin Profile or Update Contact Profile for guidance.