
You can create rules to dynamically include additional recipients based on predefined conditions while sending a message. This helps automate message distribution and ensures the right people receive notifications without requiring manual recipient selection each time.
Key highlights of this functionality are:
-
Rules can be configured for individual messages or at the channel level
-
Create multiple recipient rules to each message or channel.
-
Define rule conditions based on Current Day, Current Time, Message Sender, and Current Date of the Month.
-
Rule recipients can be selected the same way as standard message recipients — by group, individual, via map, recipient filter, or CSV upload.
-
Preview all recipients added through a rule before sending a message.
-
Easily manage rules with edit and delete options.
-
Any rules set on a channel are automatically applied whenever that channel is used to send a message
Create Rules For Message Recipients
-
Click the New Message dropdown and select a message type.
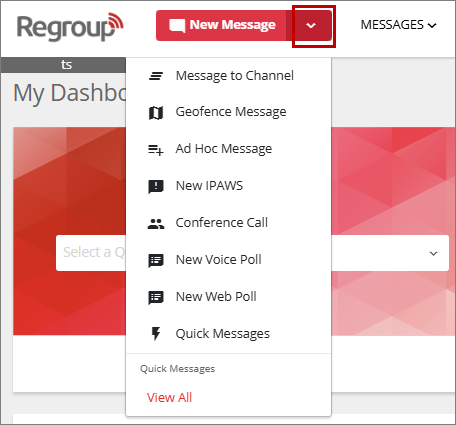
or
Click the New Message button.
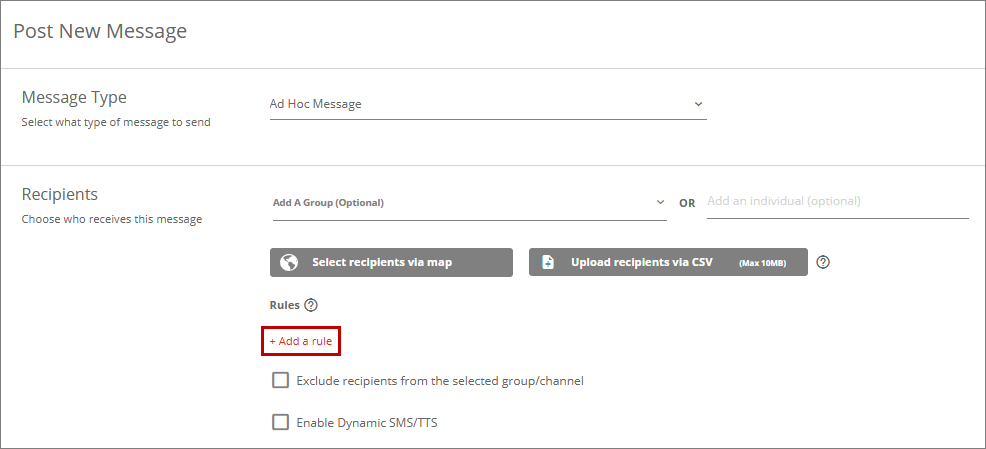
The Post New Message page displays.
-
From Message Type dropdown, select a type of message you want to send (For example, message to channel, Adhoc message, Geofence message, etc.).
-
Under the Recipients section, click +Add a Rule.
-
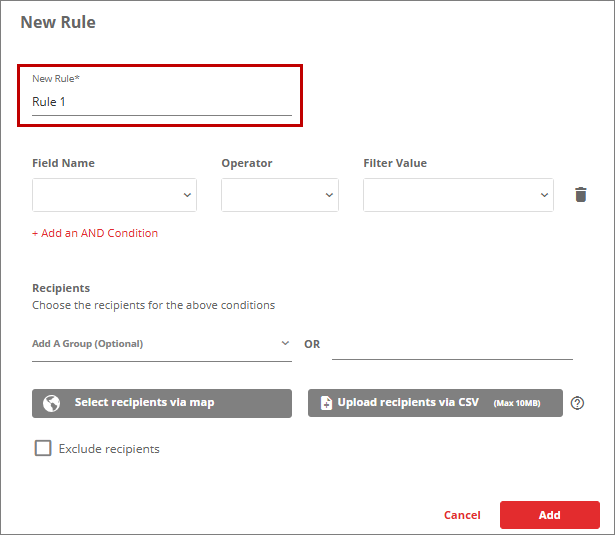
In the New Rule dialog, specify a name for the rule in the New Rule field.
-
Configure one or more conditions for the rule. When multiple conditions are added, they are connected using AND, meaning all conditions must be satisfied for the rule to match.
To configure a condition:
-
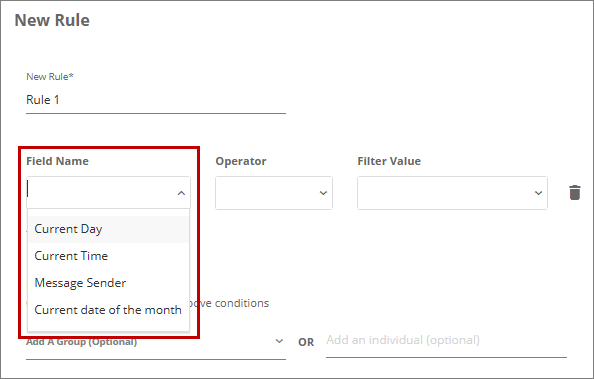
From the Field Name drop-down list, select the attribute that you want the rule to evaluate. The system uses this attribute when determining whether the rule matches. The available attributes are:
-
Current Day: Evaluates the rule based on the selected day of the week.
-
Current Time: Evaluates the rule based on the specified time range.
-
Message Sender: Evaluates the rule based on the selected message sender.
-
Current date of the month: Evaluates the rule based on the selected date of the month.
Note: Each field has specific operators and filter values associated with it. For details about the operators and filter values associated with each field, see the table below on this page.
-
-
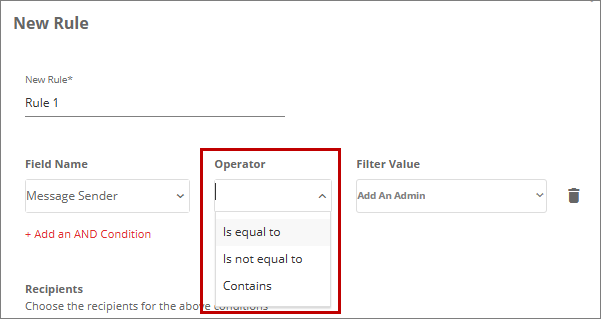
Select an operator from the Operator dropdown list.The Operator determines how the selected field is compared with the specified filter value. The available operators are:
-
is equal to: The condition matches when the selected field exactly matches the specified filter value.
-
is not equal to: The condition matches when the selected field does not match the specified filter value.
-
is between: The condition matches when the field value falls within the specified range.
-
Contains: The condition matches the selected field contains the specified filter value. For example, if the field is Message Sender, the operator is "Contains", and the filter value is "John", the condition matches values such as "John Smith", "John Doe", or "Admin John".
Note: Each field has specific operators and filter values associated with it. For details about the operators and filter values associated with each field, see the table below on this page.
-
-
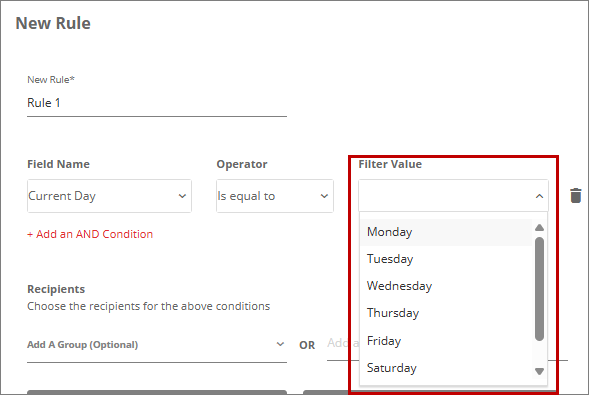
In the Filter Value field, specify the value that will be compared against the selected field. For example, if you select "Current Day" as the field, choose a day such as Monday, Tuesday, or Friday as the filter value.
Note: Each field has specific operators and filter values associated with it. For details about the operators and filter values associated with each field, see the table below on this page.
-
-
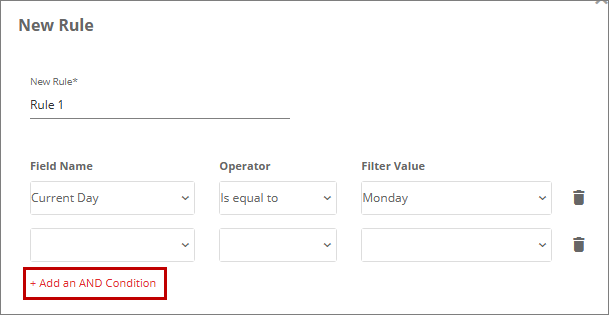
To add multiple conditions to a rule, click Add an AND Condition. A new condition row is added. Configure the condition using the parameters described above.
When multiple conditions are connected using AND, all specified conditions must evaluate as true for the rule to be applied.
-
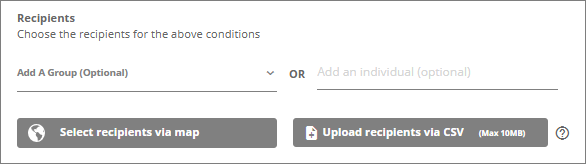
In the Recipients section, choose the recipients who should receive the message when the rule conditions evaluate as true. You can choose the recipients in any of the following ways:
-
Add Groups
-
Add Individual(s)
-
Select recipient(s) via map
-
Upload recipient(s) via CSV
-
-
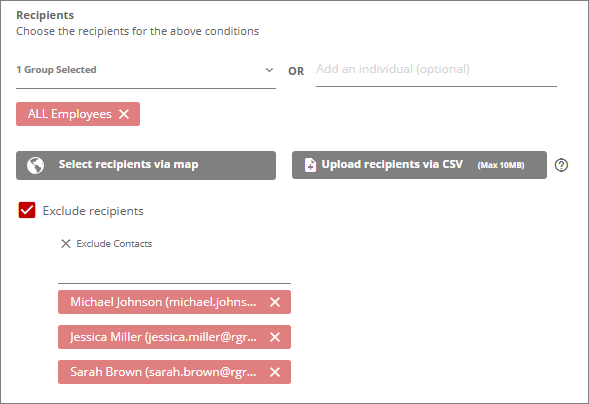
Optionally, select Exclude Recipients option to prevent specific contact(s) from receiving the alert when the configured rule condition(s) are met. After enabling Exclude Recipients, select the contact(s) you want to exclude from the contacts selection field below.
Note: The excluded contact(s) will not receive the alert even if they are part of orignal recipient(s) list.
-
Click the Add button.
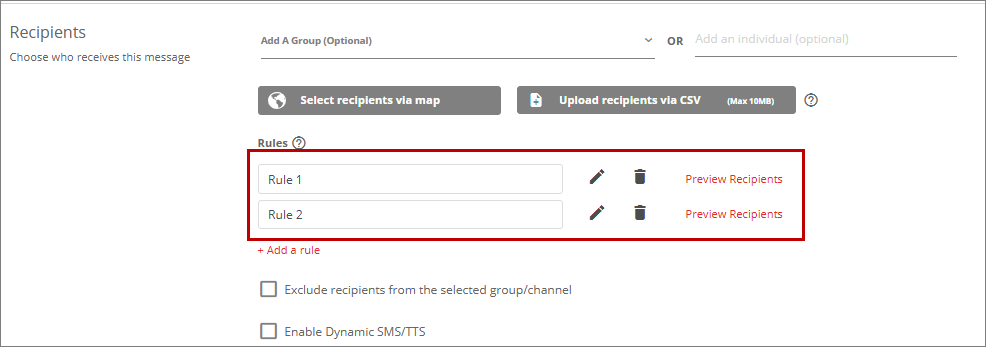
The rule is added under the Recipients section on the Post New Message page. To create additional recipient rules, click Add a Rule and configure the new rule by following the steps described above.
| Field Name | Operator | Filter Value |
|---|---|---|
| Current Day |
|
Monday through Thursday |
| Current Time | is between |
|
|
Message Sender |
|
Lets you select admin(s) who have access to the original recipient group or channel. You can use the Select All option to select all admins as a value. |
| Current Date of the Month |
|
1 to 31 |
You can perform the following actions for the added recipient rule(s) in the Post New Message page:
-
Click Preview Recipients for a rule to view the recipients associated with it. A list of all recipients included in the rule is displayed. These recipients will receive the alert when the rule's configured condition(s) are met.
-
Click Edit icon for a rule to modify it. In the Edit Rule dialog, modify the rule parameters as required, and click the Update button.
Create Rules for Channel Recipients
This section describes how to create recipient rules for a channel. These rules are automatically applied to the channel recipients when the channel is selected during message creation.
-
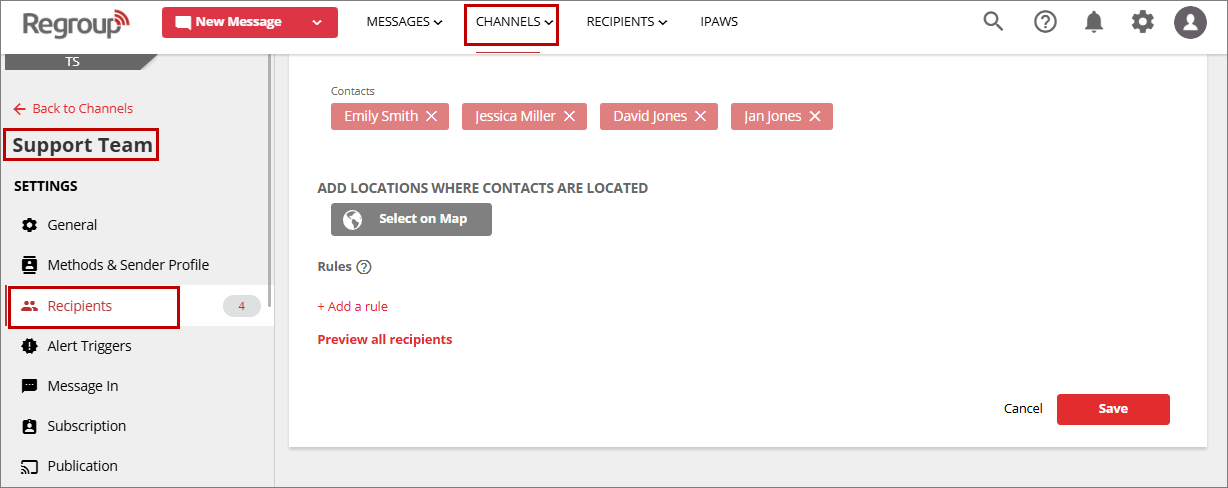
Navigate to Channels > My Channels > "Channel_Name" > Recipients.
-
On the Recipients page, click Add a rule under Rules.
-
In the Rules dialog, configure the rule for the channel recipients. For detailed instructions on creating a recipient rule, see the Create Rules For Message Recipients Create Rules for Message Recipients topic, starting from Step 4 through Step 9.
After a recipient rule is created for a channel, you can perform the following actions on the rule:
-
Click Preview Recipients for a rule to view the recipients associated with it. A list of all recipients included in the rule is displayed. These recipients will receive the alert when the rule's configured condition(s) are met.
-
Click Edit icon for a rule to modify it. In the Edit Rule dialog, modify the rule parameters as required, and click the Update button.