
You can send recorded or uploaded voice files to groups, channels, or individuals. You can attach the voice clip to any message or send a call using TTS/Voice as a delivery method.
Note: You must contact Regroup to enable voice call retries. When you send Voice Polls or messages with Call (TTS/Voice) as a delivery method, recipients can answer or receive the call in their voicemail. If their phone is busy or out of coverage, the system retries calling them again only if you enable this functionality.
The following procedure focuses only on sending voice messages. To learn more about the components of sending messages, see the topic Send New Message.
Here is how you send voice recordings:
-
Click New Message button. See the following image:
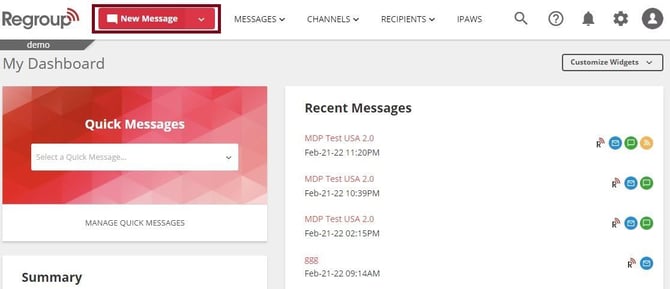
The post new message page opens.
-
In the Message Type section, select the message type as Message to Channel or Ad Hoc Message.
You can also select these message types directly from the New Message dropdown. See the following image:
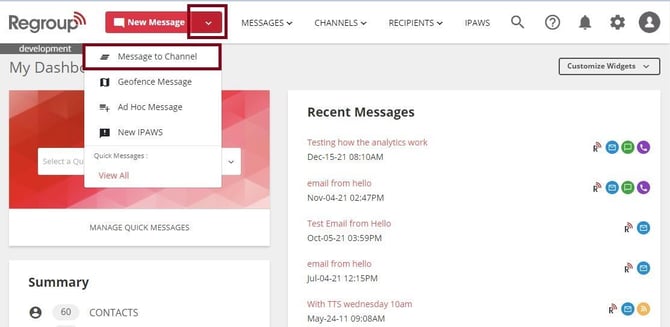
The Post New Message page opens with the selected message type.
-
Add Recipients applicable to the message type.
-
In the Delivery Method section, select Call (TTS/Voice) to send the voice recording as call. See the following image:
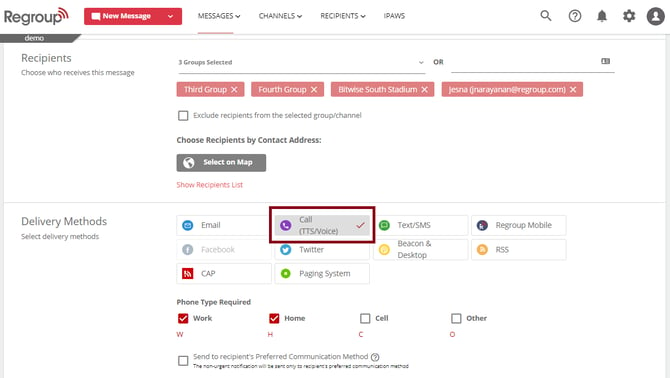
Tip: You can choose any other required delivery method if you plan to send the voice clip as an attachment.
-
Click to select the required sender profile.
In the Message Contents Section:
-
Enter a title in the Message Title field.
-
Click Custom content for each delivery method checkbox.
-
Click the Call (TTS/Voice) in the Message Body. See the following image:
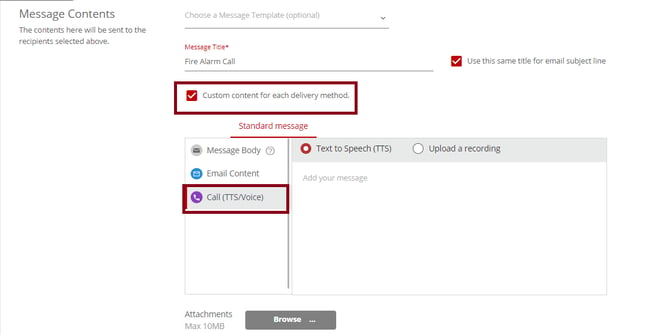
-
To enable the system to convert a text you enter into a voice while calling:
-
The Text to Speech (TTS) radio button is selected by default. Or, click and enable it.
-
Enter the text to convert to voice in the message body. See the following image:
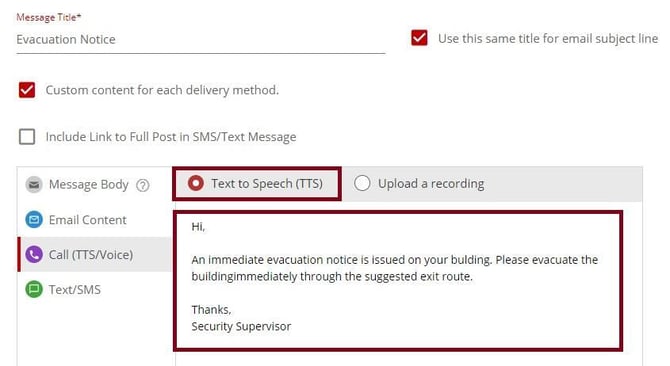
The system converts this text to a voice call when you send the message. The call is sent using the voice profile chosen in the sender profile section. See the Call (TTS/Voice) field (step 8) of the create sender profile.
-
Click Listen to hear the text converted into a voice clip before sending the message.
See the following image:
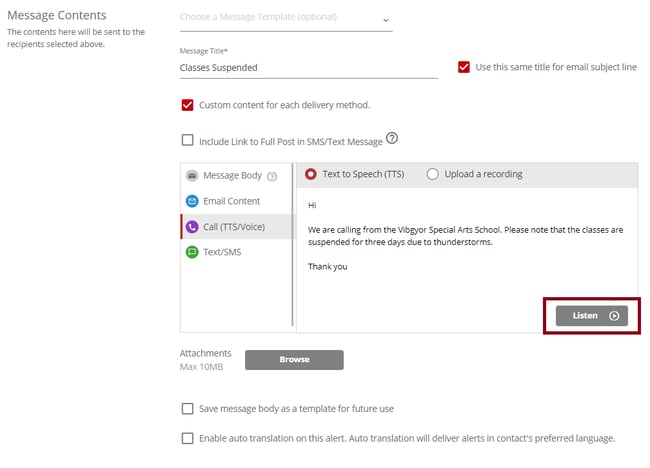
-
-
To record a voice clip, select the previously created sound clip or upload the voice clip:
-
Click the Upload a recording tab. See the following image:
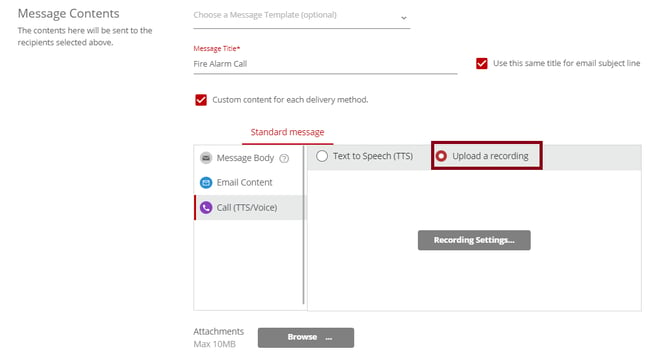
-
Click Recording Settings. See the following image:
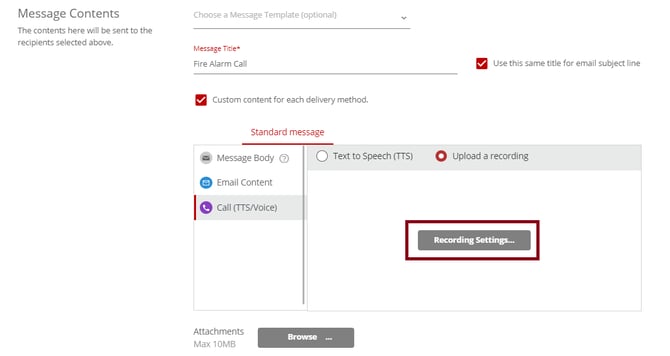
The Upload a Recording page opens.
-
To select already recorded voice files, click the radio button corresponding to the required file and click Save.
Tip: You can sort the files by clicking the downward arrow at the created date.
See the following image:
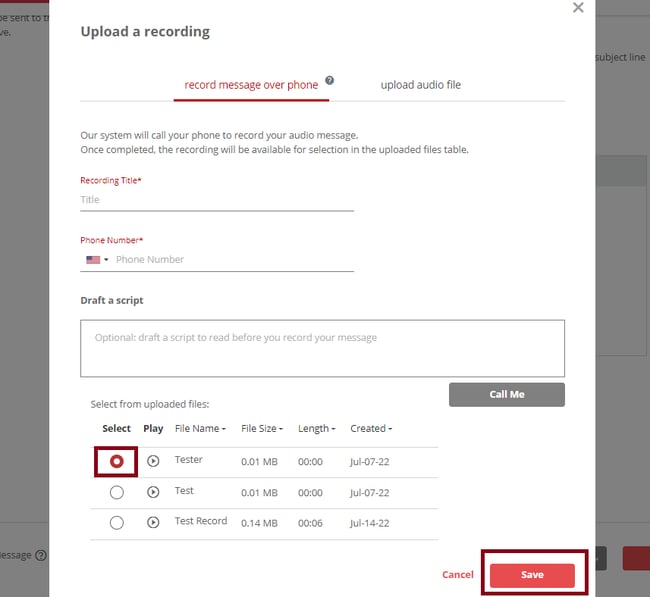
The selected file appears to be added to the message body.
-
To record the message over the phone, see step 4 onwards of the Create Voice Recordings.
-
To upload a voice clip:
-
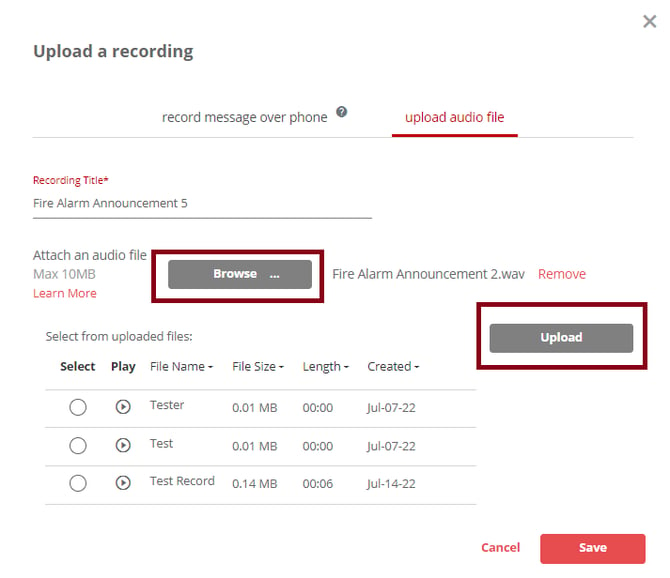
Click the Upload audio file tab.
-
Enter the Recording Title. See the following image:
-
Click Browse and open the voice clip from your computer > Click Upload.
Note: The file you upload must be in .WAV format and the maximum size should be 10MB.
See the following image:
-
-
-
Click Save.