
The selected message defaults appear preselected and updatable when sending new messages.
Here is how you set up message defaults for your organization:
-
Click the Organization Settings icon on the top right corner. See the following image:
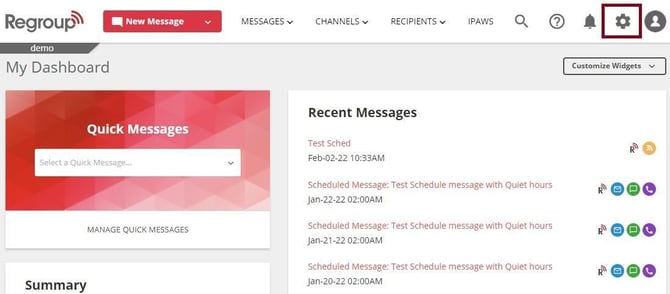
The Organization Settings page opens.
-
Click the Message Settings tab on the left navigation panel. See the following image:
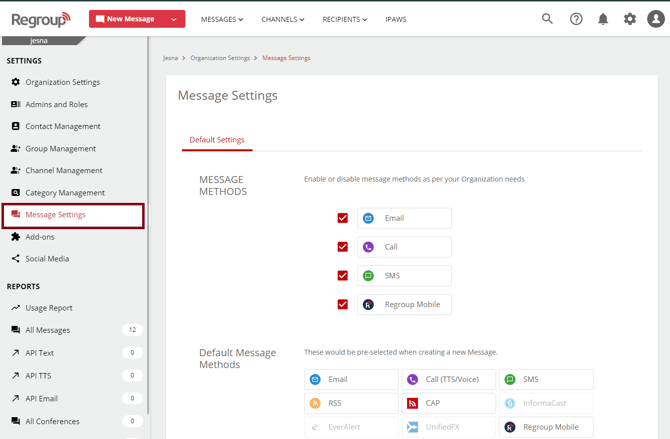
The Message Settings page appears.
-
In the Message Methods section, click the checkboxes corresponding to the delivery methods that you want to make available for messaging in your organization.
See the following image:
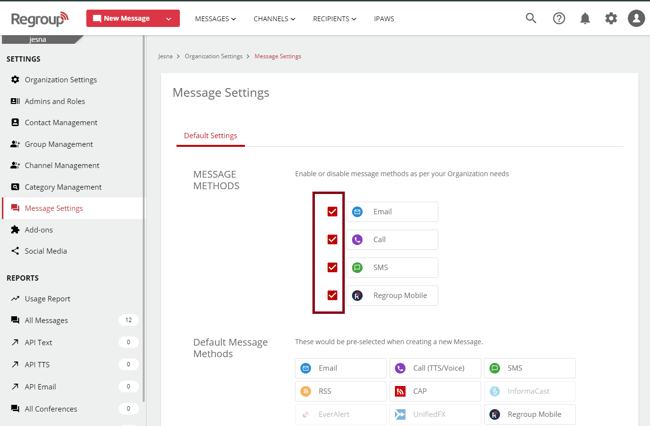
Tip: Methods disabled here wont be available on the New Message page while sending messages.
-
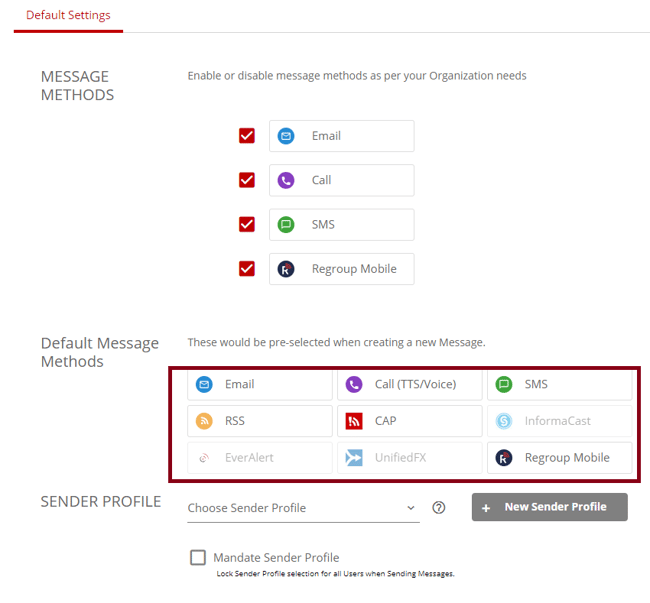
In the Default Message Methods section, select the delivery methods to set as default for your organization.
The selected delivery methods appear preselected when sending new messages.
See the following image:
-
If you select Email, SMS, Call, or Regroup Mobile as delivery methods, a checkbox called Use Delivery Priority Order appears. You can use delivery priority order to define the order and interval at which the system should attempt to deliver messages using each method.
You cannot define priority order for delivery methods other than Email, SMS, Call, or Regroup Mobile. The system immediately delivers the message using those methods and follows the priority order.
Note: The delivery priority order treats a message as urgent and invalidates the recipient’s quiet hours setting.
The Delivery Priority Order is a free add-on. To know more about it, see the topic, Delivery Priority Order: Overview.
See the following image:
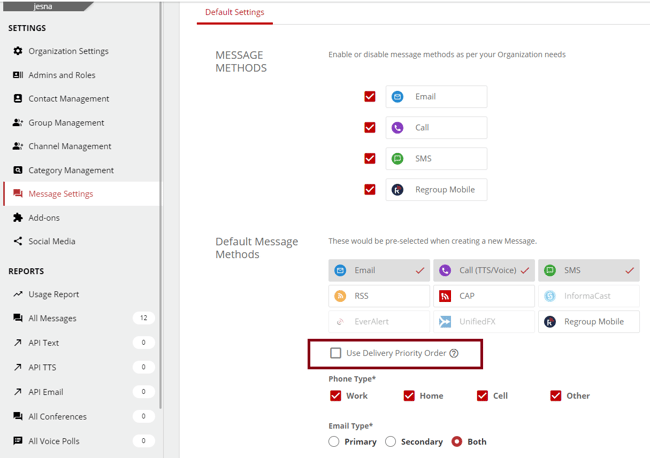
To set a delivery priority order as the default for your organization, perform the procedure in the following topic, step 5 onwards: Send messages with a defined delivery priority order.
-
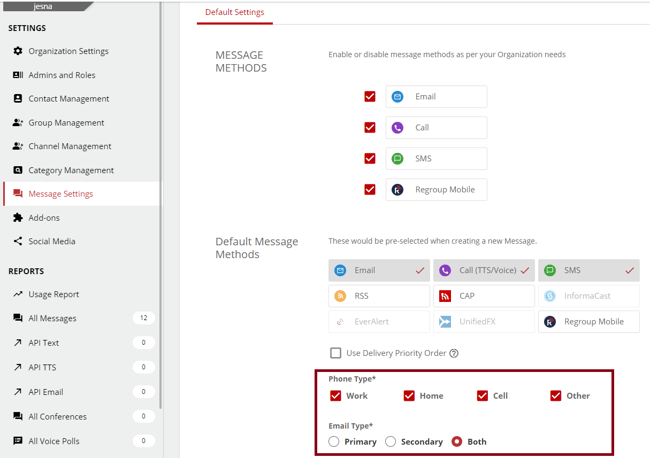
If you choose SMS or Call/TTS and Email as the delivery method, specify the Phone and Email Types to which messages should be sent.
The following are types:
-
Email Type: Primary and secondary are defaults.
-
Phone Type: All the phone types are selected as default.
See the following image:
-
-
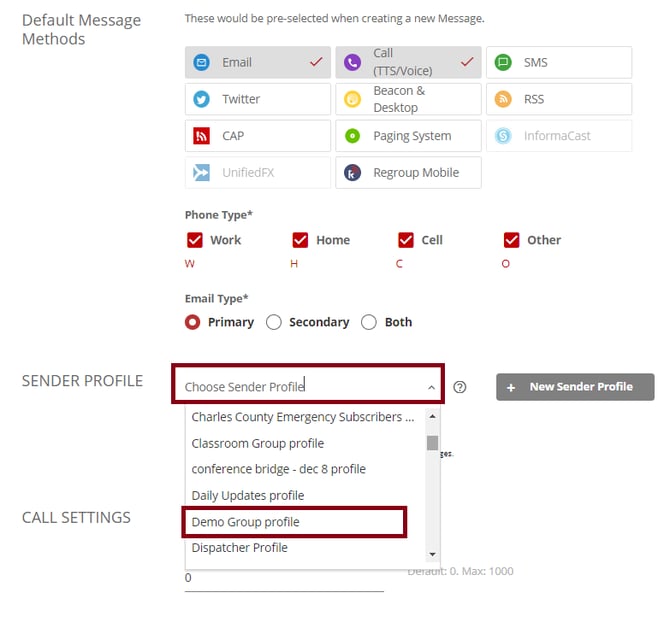
Click the Choose Sender Profile drop-down in the Sender Profile section to select an existing sender profile as default for the organization.
Tip: You can view and select only the sender profiles that are shared with you, the channel, or all admins.
See the following image:
-
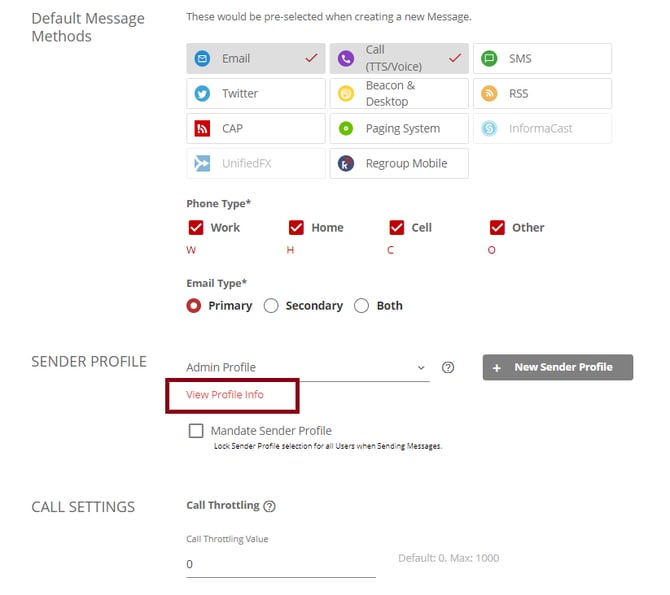
Click View Profile Info to see the details of the selected profile. See the following image:
Note: You cannot save the message defaults if the selected sender profile has no caller ID and Call (TTS/Voice) is selected as a delivery method.
-
You can create a new sender profile by clicking the New Sender Profile button. The New Sender Profile page opens. Follow steps three onwards in the topic Create Sender Profiles to create a new sender profile.
-
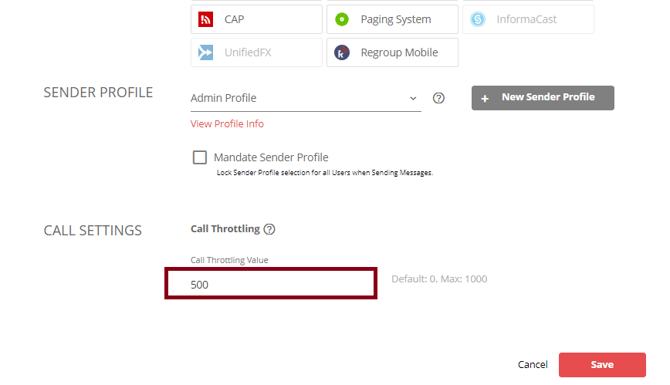
If you want to limit the number of calls the system calls in a minute, you can enter a Call Throttling Value.
Call Throttling reduces the number of calls sent from your organization simultaneously. When you set up a Call Throttling Value, the system calls only that many calls per minute. For example, if you enter 50 as the Call Throttling Value, the system calls only 50 phone numbers in a minute. If you have 100 recipients in the message, the system finishes calling them in 2 minutes, with 50 in each minute.
Note: Without any throttling value, the system calls a maximum of 1000 calls per minute.
See the following image:
-
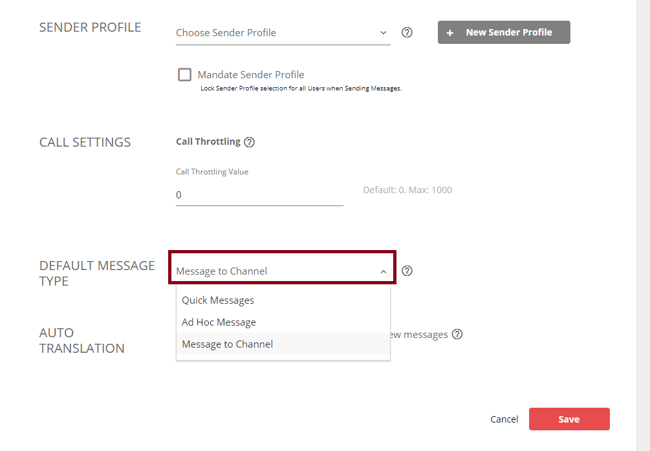
In the Default Message Type section, you can choose what Message Type appears preselected when you open the New Message page. Currently, the quick message appears as default.
Choose the message type your organization seldom uses from the following:
-
Quick Message
-
Ad-Hoc Message
-
Message to Channel
See the following image:
-
-
You can click the Auto Translation checkbox to automatically translate all messages from your organization into the recipient's preferred language.
When enabled, the Auto-Translation checkbox appears enabled in the New Message, Quick Message, and Message Template pages; admins can turn it off while sending messages.
-
Click Save to save your selections