You can set up a sign-up embed by customizing the appearance, data fields, and subscription option. When subscribers sign up to your organization, they can only choose from the delivery methods you have set as message defaults for the associated channel or organization.
Here is how you enable and customize the sign-up page for your organization:
-
Click the Organization Settings icon in the top right corner. See the following image:
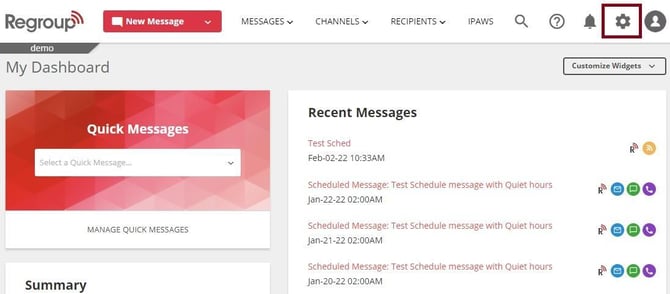
The Organization Settings page opens with the General tab.
-
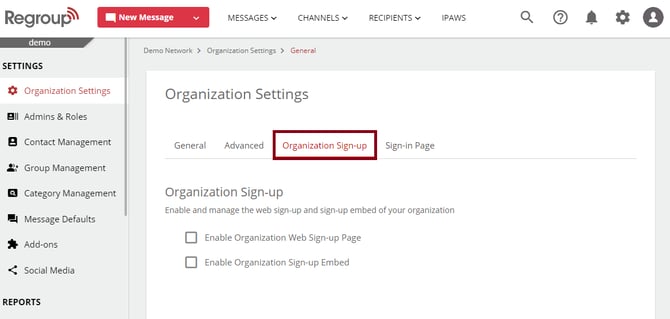
Click the Organization Sign-Up tab. See the following image:
-
Click to enable the Enable Organization Sign-up Embed checkbox. See the following image:
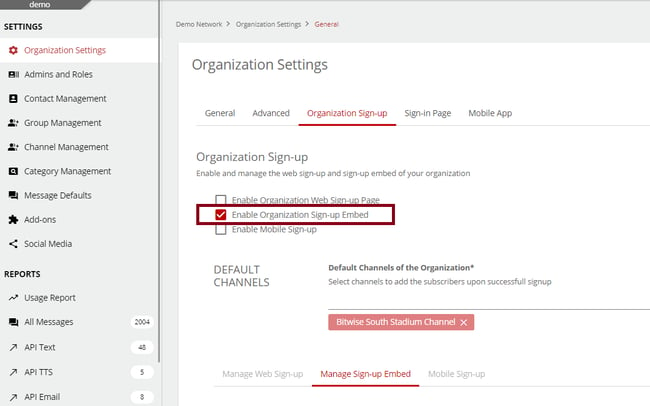
The sign-up page setup section opens.
Note: Multiple tabs appear on the Organization Sign-Up page if other signup checkboxes are enabled. You must click each applicable tab to configure them and save each tab individually to save your changes.
To set up web signup, see the topic, Set Up Organization Web Sign-up Page.
-
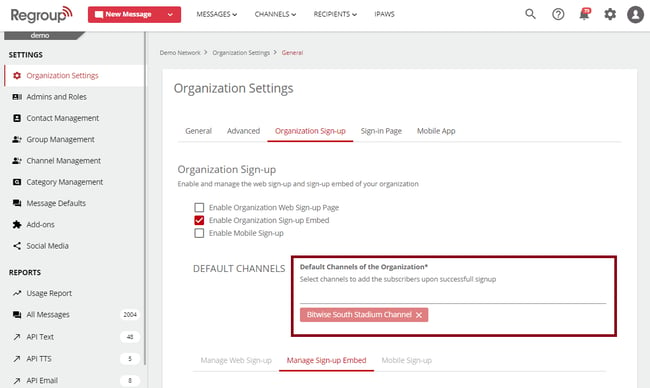
In the Default Channels section, search and select a public channel the sign-in user must subscribe to. Selecting a default channel is mandatory. However, if you want to enable users to select at least one mandatory channel of their choice from a list of channels you provide, use the Subscription Option at the bottom of this page. If you are using that option, you can use a dummy channel as the Default Channel because it becomes hidden on the Sign Up page.
See the following image:
-
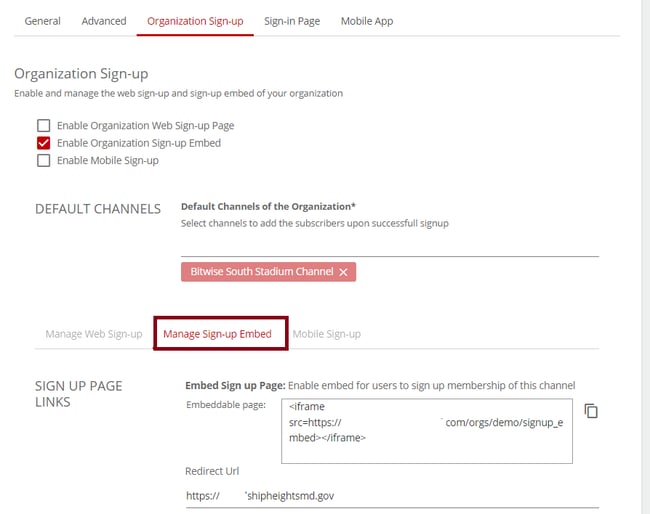
If you have other signup checkboxes enabled, click Manage Sign-up Embed tab. See the following image:
-
Use the Sign-Up Page Links section to set up the embedded sign-up page on any website or mobile app:
-
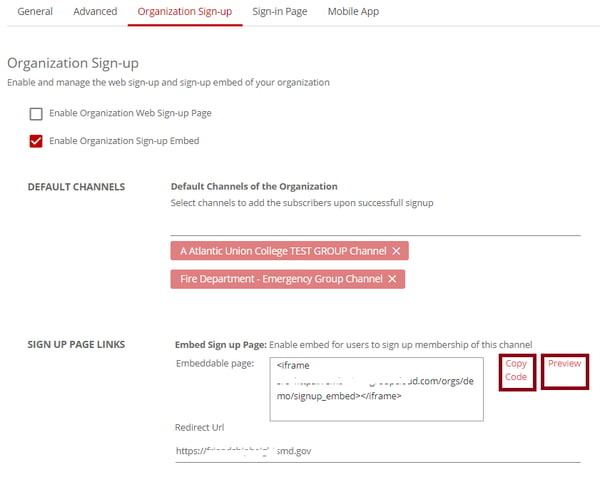
Click the Copy Code to copy the iframe code to host it on your website to embed the sign-up page.
Tip: The embedded sign-up page will be iframe and hosted outside your servers.
-
You can click Preview to see how this page appears on your website.
Note: To preview the sign-up page configuration, you must save (at the bottom of the page) your customizations first.
See the following image:
-
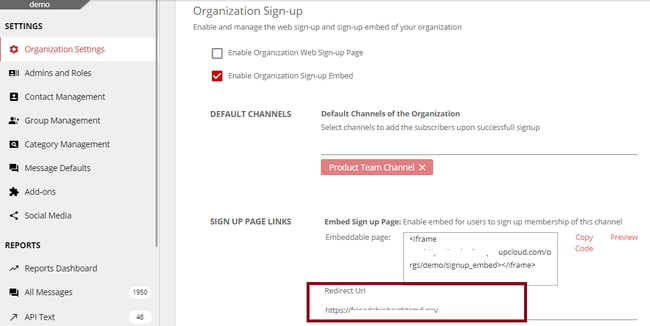
In the Redirect URL field, enter a page link to direct users after they sign up and subscribe to the allowed channels. See the following image:
-
-
In the Data Field Options section, you can define the fields users should fill in when signing up.
-
To edit what data type a user can enter in each field, click Customize the Field Type checkbox.
Note: By default, first name and last name are alphanumeric. email, phone number, and address are text fields.
See the following image:
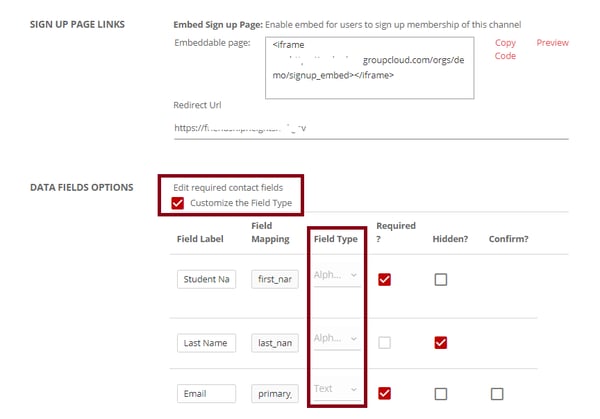
A Field Type column appears with a dropdown to select the data type.
-
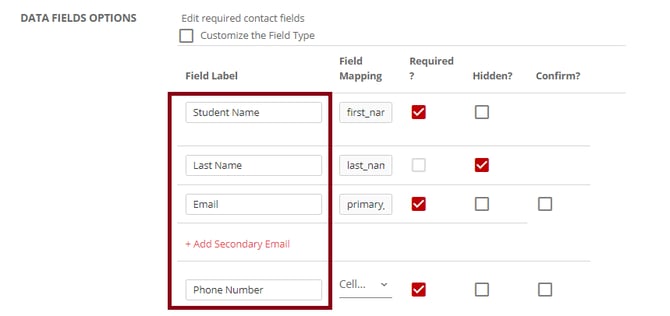
To update the label of sign-up page fields, click the Field Label and edit it. See the following image:
-
-
-
You can click the Field Mapping dropdown to change the mapping of fields other than First Name, Last Name, Email, and Primary Email. See the following image:

-
If the Customize the Field Type check box is enabled, click the Field Type dropdown to select the field type for each attribute.
-
Click the Required and Hidden checkboxes to mandate or hide the field on the sign-up page.
Tip: If neither of the boxes is selected, the field appears on the sign-up page as a non-mandatory item.
-
Click Confirm check box to enable sending a sign-up confirmation OTP or verification link to the subscriber’s phone number or email. See the following image:

Note: You must enable the Auto Translation add-on and the Post Translation checkbox to let contacts choose their preferred language while signing up.
-
Click Add Secondary Email to add a secondary email to the login field. See the following image:

Note: Ensure you have at least a phone number or email address as your contact method.
-
-
If you have enabled the Auto-Delete Subscription option from the Advanced tab of the Organization Settings, you can configure a duration to automatically delete all subscriptions signed up using that embed. You can also allow subscribers to select a subscription end date when they sign up.
Note: You can also configure the Auto-Delete Subscription from channels. If the channels you added as default channels or additional channels in the signup page are configured with a subscription end date, then the end date configured at the channel level is considered the subscription end date. Among the subscription end date configured at the default channel and additional channel, the date configured for the default channel is given precedence.
To set Auto Delete Subscription:
-
Enable Auto-Delete Subscription option from the Advanced tab of the Organization Settings.
-
Click Enable auto-delete of subscription checkbox. See the following image:
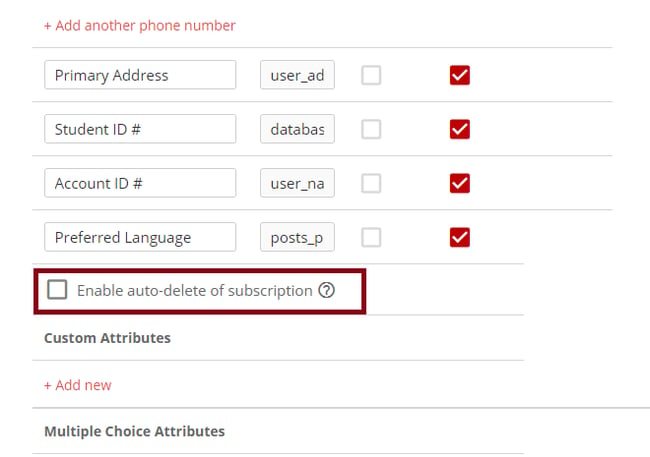
A list of options available to configure Auto-Delete Subscription opens.
-
Select either of the following two options :
-
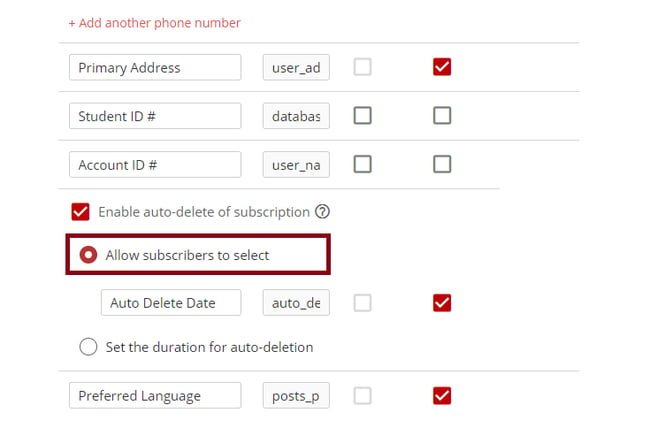
Allow subscribers to select: Use this to allow subscribers to select a subscription end date when they sign up.
-
Enable this checkbox to provide a calendar in the signup embed that allows users to select a date to end their subscription.
See the following image:
-
You can click the Required and Hidden checkboxes to mandate or hide the option on the sign-up page. By default, Hidden is selected.
Tip: If neither of the boxes is selected, the field appears on the sign-up page as a non-mandatory item.
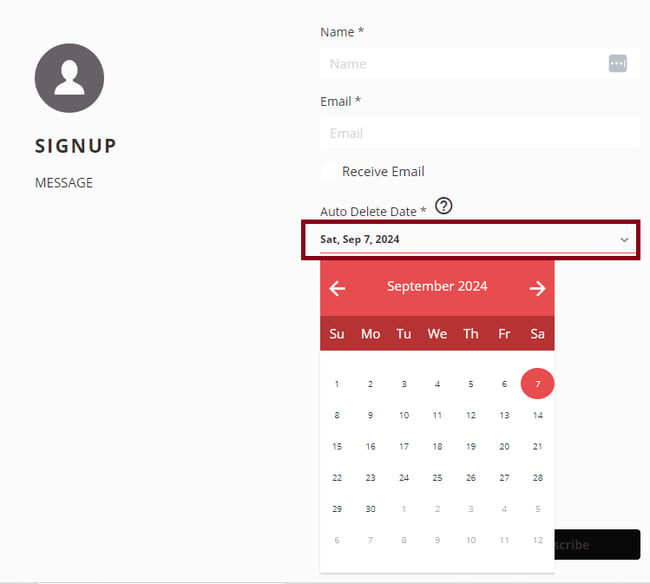
The following image shows how the signup embed displays the signup page when allowing subscribers to choose a subscription end date:
-
-
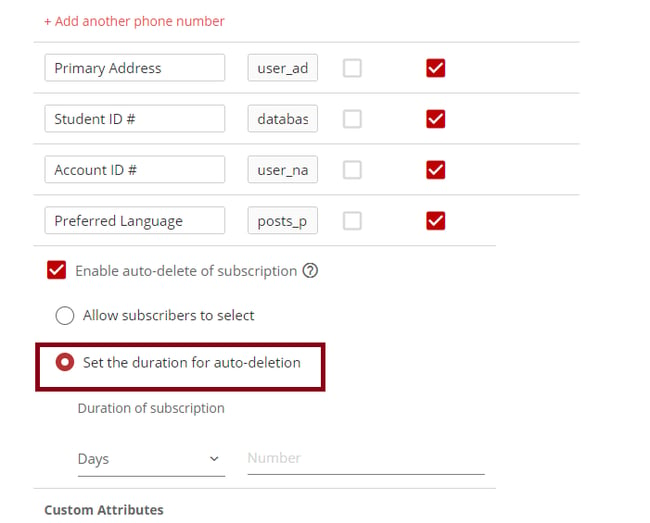
Set the duration for auto-deletion: Use this to configure a duration to automatically delete all subscriptions signed up using this embed.
-
Enable this checkbox to define a subscription duration in the organization signup embed page. See the following image:
-
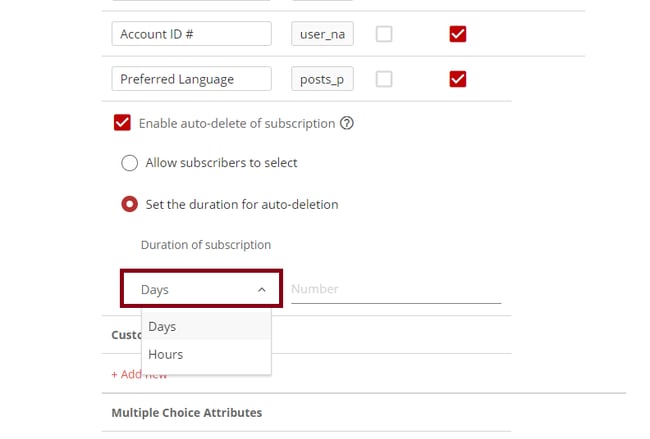
Click the Days dropdown to select a unit of time to define the subscription end time. The available options are Days and Hours.
See the following image:
-
In the Number field, enter the number of hours or days when the subscription should end.
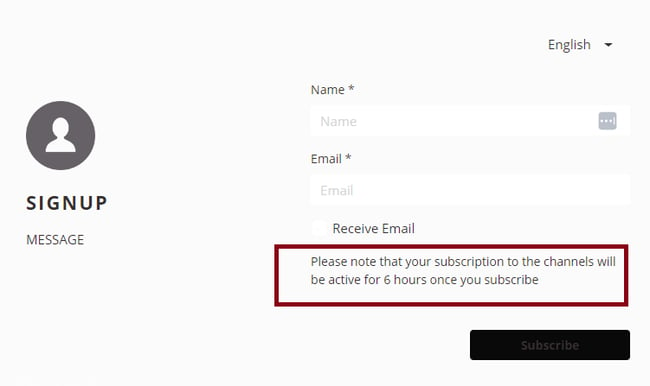
The following image shows how the signup embed displays the signup page when you choose the subscription end time as 6 hours:
-
You can directly click Save to save your changes.
Note: The contact profile of users who signed in using this embed will display the subscription end date according to your settings. You can directly go to any contact profile and add a subscription end date by clicking the Enable the automatic expiration of subscription checkbox.
-
-
-
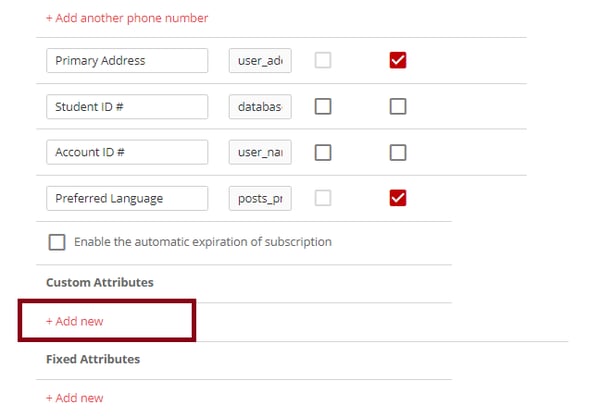
Click Add new under the Custom Attributes to add the custom attribute as a field. See the following image:
-
-
In the Display Options, customize the color of the sign-up page:
-
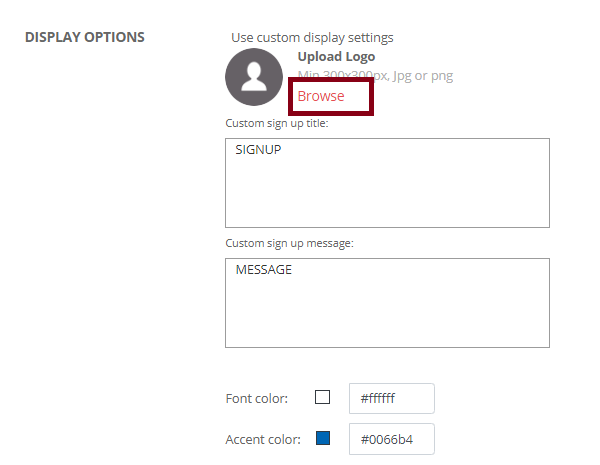
Click Browse to upload your organization’s logo on the sign-up page. See the following image:
-
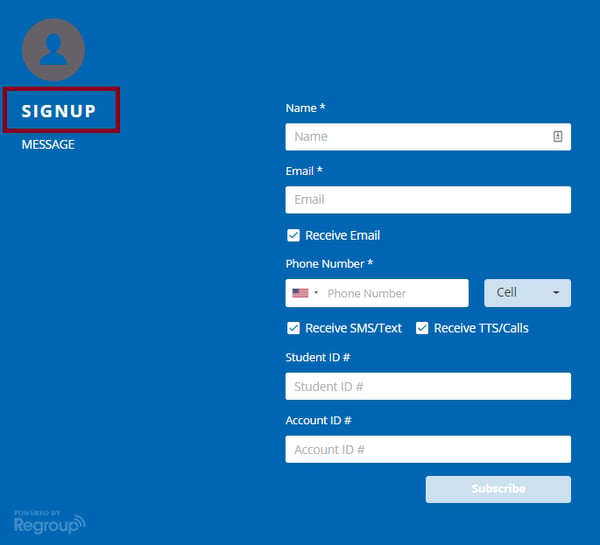
Enter a sign-up title in the Custom Sign Up Title field. The following is how it appears on the sign-up page:
-
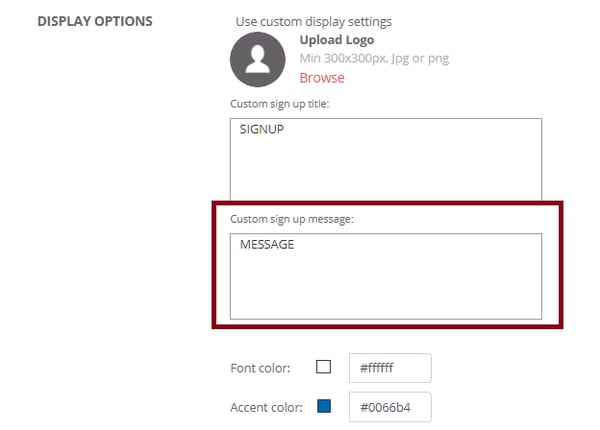
Enter a sign-up message in the Custom sign-up message field. You can describe what the subscription does. See the following image:
-
Click the color picker box to select the following:
-
Background Colour: the color of the background on which all elements appear
-
Font Color: the color of fonts on the sign-up page
-
Accent color: the color of highlighted texts on the sign-up page.
-
-
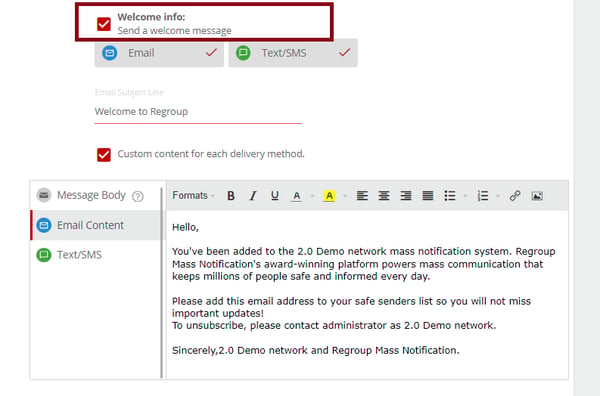
Click the Welcome info checkbox to send a welcome message to the signed-in users. See the following image:
-
Select the delivery methods from Email or Text/SMS.
-
Enter the Subject Line. A default welcome message is set up for all delivery methods.
-
Click the Custom content for each delivery method checkbox to customize the welcome message per delivery method.
-
Click each delivery method and enter the message.
-
-
In the Subscription options, you can select channels for users to subscribe to.
-
Click the Allow contacts to subscribe to the following links checkbox to allow contacts to subscribe to selected channels when they sign up. See the following image:

-
Click the message body to update the welcome message for new subscribers.
-
To provide a list of channels from which users must select at least one to subscribe to your organization, click the User has to select at least one of the following channels checkbox.
Note: If you mandate subscribers to select a channel from the list (the above option), the selected Default Channel becomes hidden on the Sign Up page. In this case, you can use a dummy channel as the Default Channel.
-
Click the Search Channels dropdown to select channels for the channels.

Tip: Users can unsubscribe from the channels if the channel settings allow it after signing in.
-
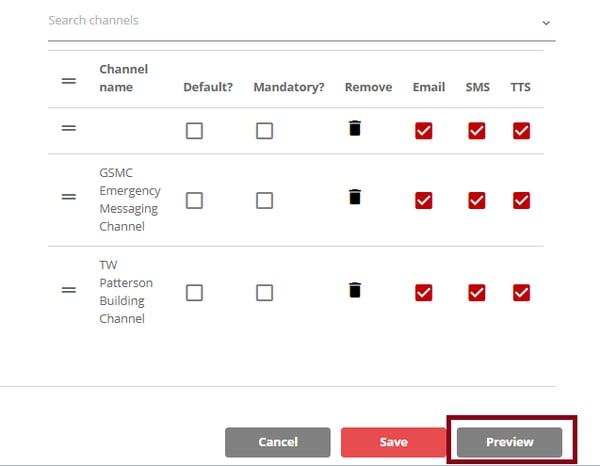
Click the checkbox to enable or disable each channel's delivery method, such as Email, SMS, and TTS. See the following image:

-
Select the following subscription options for each channel:
-
Default: all the signed-up users get automatically subscribed to this channel.
-
Mandatory: all the users must subscribe to this channel to signed-up.
Note: The delivery methods set as default for the organization or default channel are only available here. If you disable any delivery method from the message default page of the channel or organization, all related options are removed here. If only one delivery method is selected as the message default, the system marks it as mandatory on the signup page.
-
-
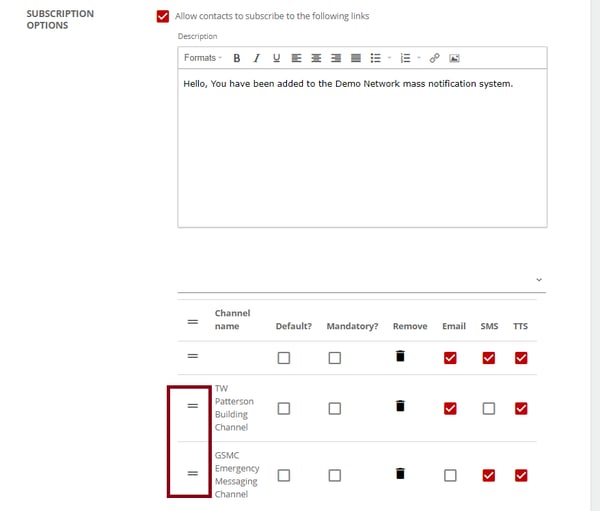
You can rearrange the channels’ order by clicking the hamburger menu icon. See the following image:
-
-
Click Save. See the following image:
If you select more than one sign-up option checkbox, you must individually save changes in each tab.
-
Click Preview to see how the page appears for the user. See the following image: