
The General tab in Organization Settings is your hub for managing your organization’s core details, security preferences, branding, and message confirmation settings. and branding. From here, you can:
- Add or update organization information, including name, description, timezone, and location.
- Customize the Regroup application with your logo and colors.
- Manage group types and set group creation rules.
- Enable confirmation pages for different types of messages.
- Configure password policies and account lockout
These settings help ensure your organization’s account is secure, consistent, and aligned with your brand.
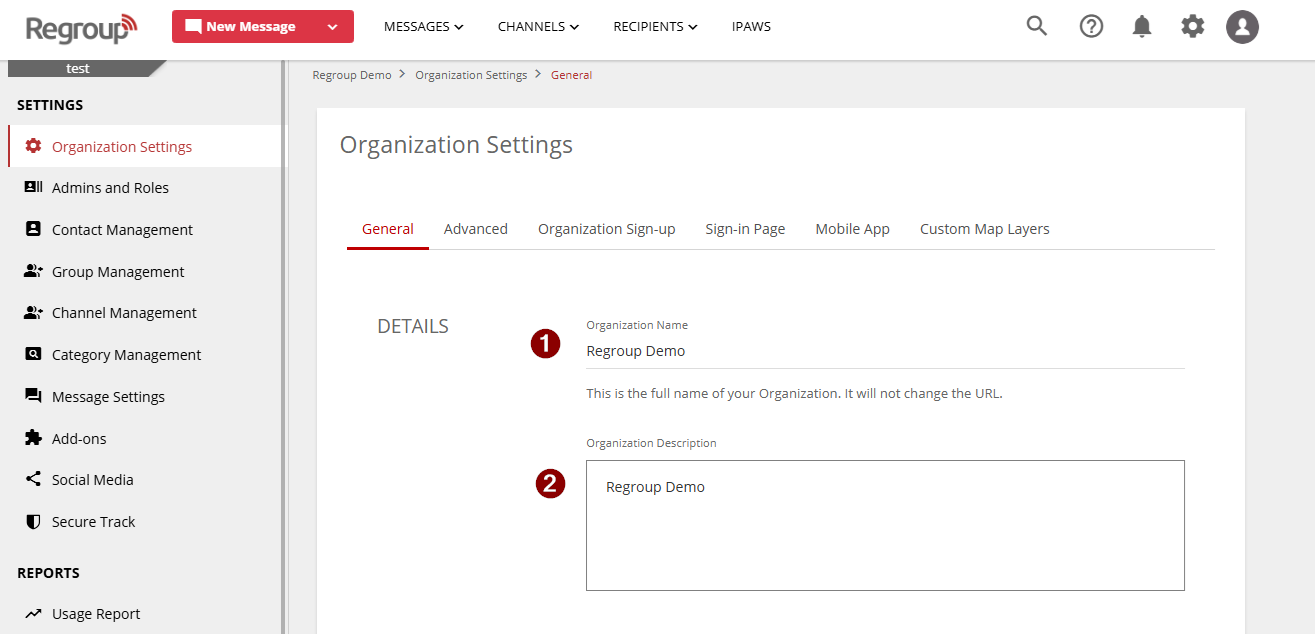
Organization Details
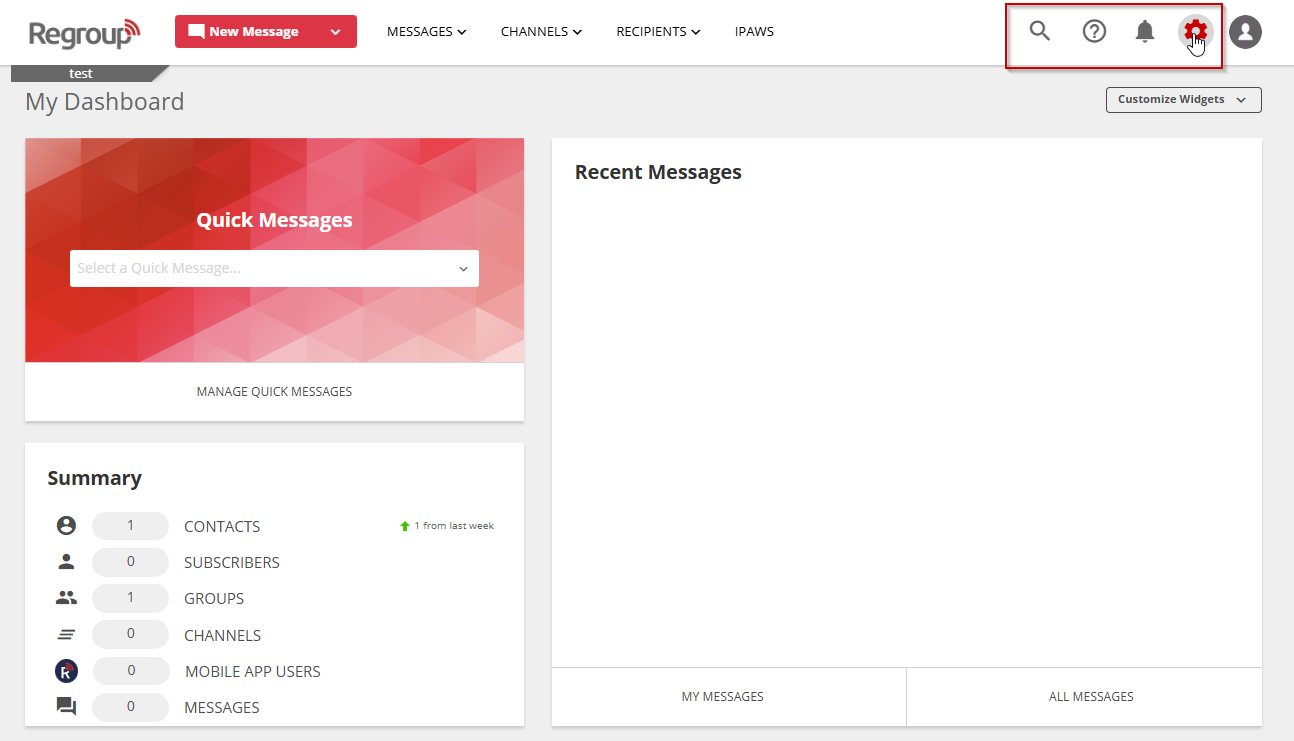
- Navigate to Organization Settings via the icon in the top right corner.
- In the Details section:
- Enter the organization name and description.
- The description field is required. If left blank, it defaults to “Welcome to Regroup.”
- Scroll down to the bottom of the page and click Save to apply your changes.
Note: The Organization Description is required to save settings.
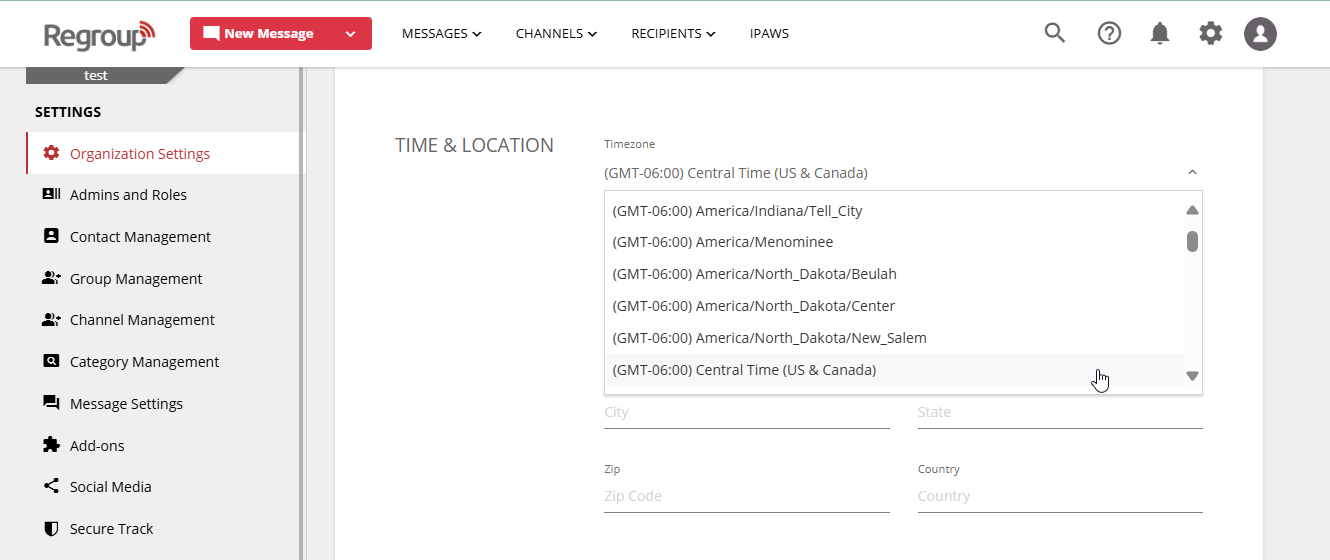
Set Time & Location
- In the Time and Location section:
- Select a timezone from the Timezone dropdown. This sets the timestamp for communications.
- Click Select Using Map to choose your organization’s location, which sets the map center.
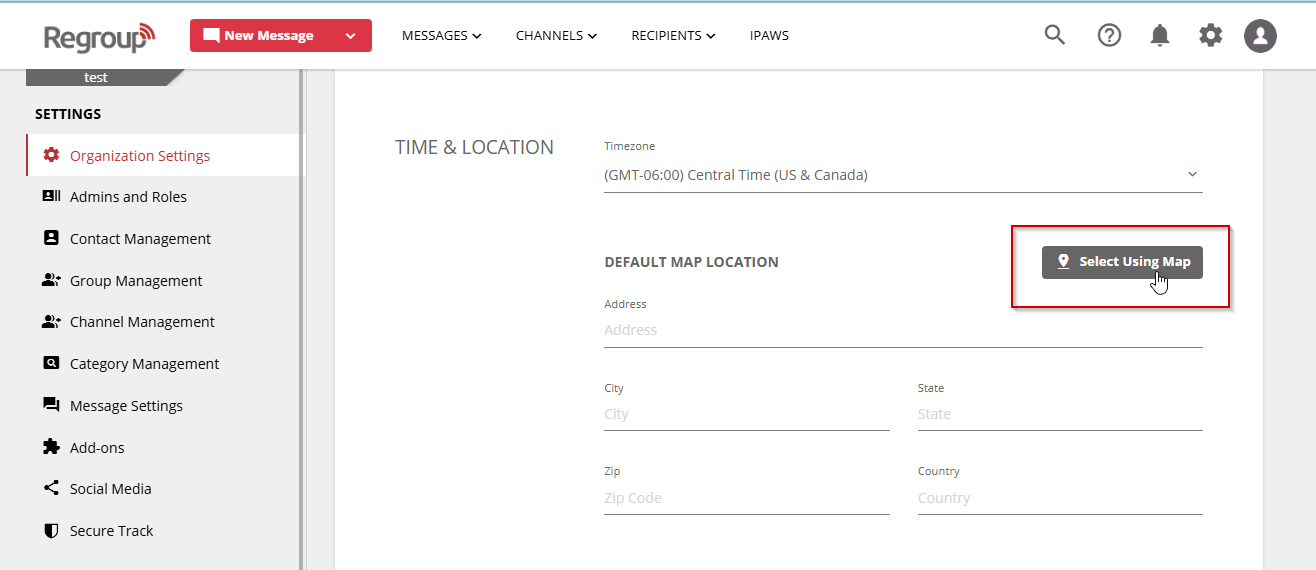
- Alternatively, enter the address in the Find address or place field.
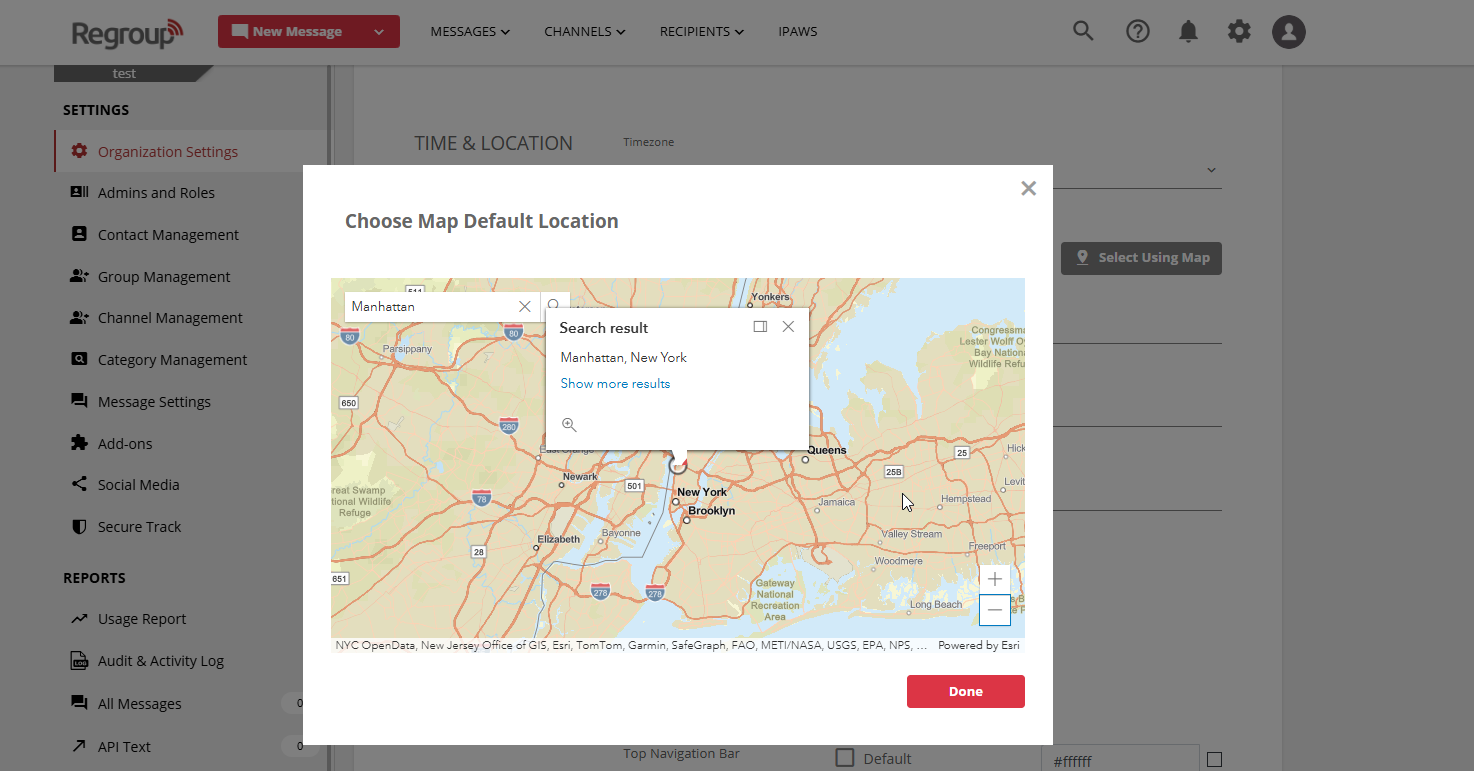
- Save your changes.
Branding and Display
- In the Display Settings section:
- Uncheck Use the default Regroup logo to upload a custom logo (PNG or JPG, 3.5:1 aspect ratio, 128x36 px).
- Click Choose File to upload your logo.
- CUSTOM COLORS
Use the color picker to set:
- Top Navigation Bar color.
- Header Font Color for text and icons.
- Accent Color for labels, buttons, links, and highlights.
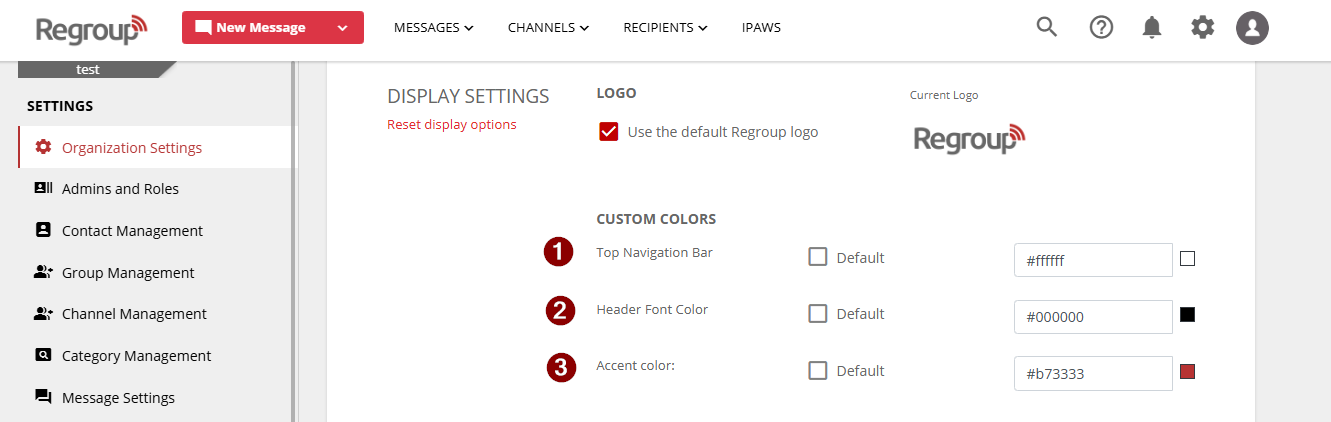
- Check Default checkboxes to revert to default colors.
- Save your changes.
Tip: Check Use the default Regroup logo to revert to the default logo.
Configure Group Types and Creation
- In the Group Details section:
- Choose a Group Creation option:
- Open Groups: Admins with permissions can create groups without approval.
- Approval Required: Admins need approval from a designated admin to create groups.
- Choose a Group Creation option:

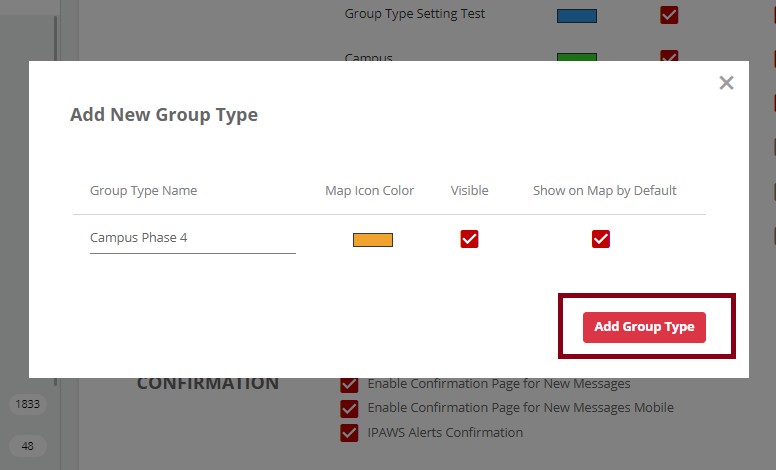
- To create a group type
- Click Add Group Type
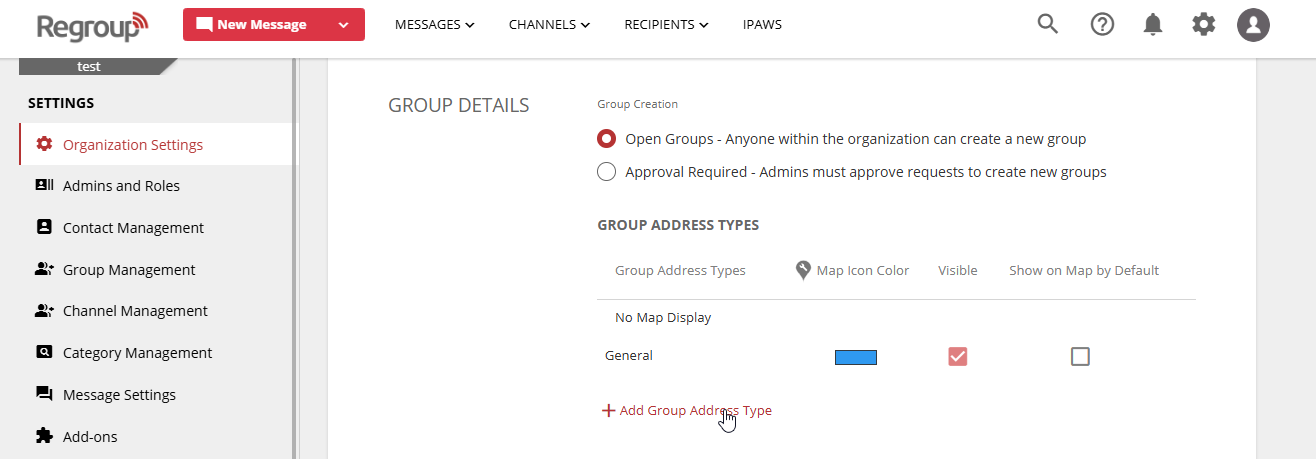
- Enter a name in the Group Type Name field.
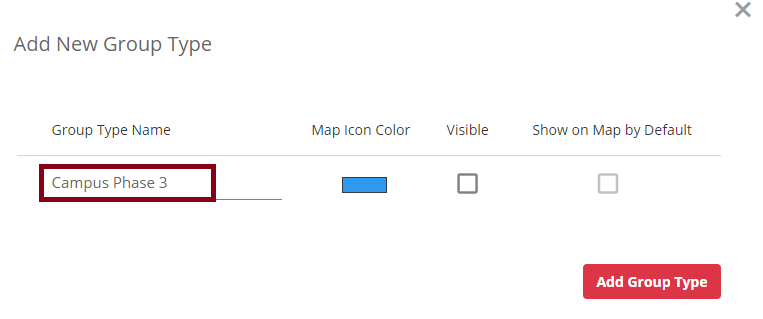
- Select a Map Icon Color for the group type’s map pins.
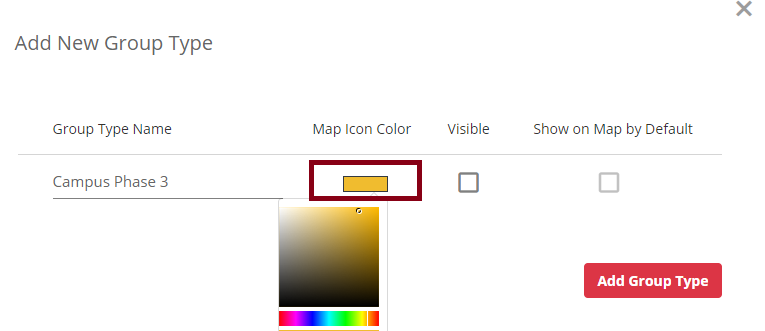
- Check Visible to make the group type visible to message senders.
- Check Show on Map by Default to display the group type on the map (available only if Visible is checked).
- Click Add Group Type to save.
- To update a group type:
- Change the Map Icon Color or toggle visibility settings.
- Click the Delete icon to remove a group type.
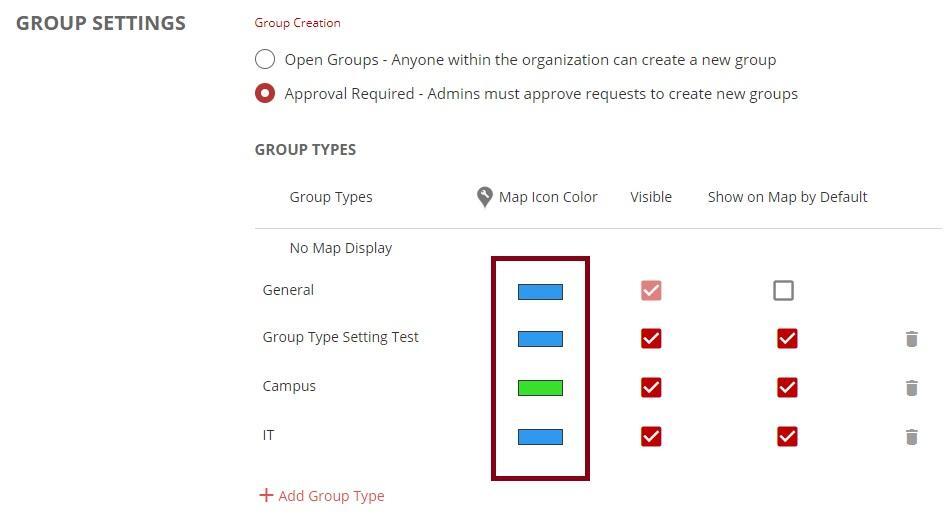
- Save your changes.
Tip: Group types categorize groups on maps, using the same pin color for easy identification during alerts or recipient selection.
Message Confirmation
- In the Confirmation section, check:
- Enable Confirmation Page for New Messages to show a summary before sending.
Enable confirmation pages to review message details before sending. Options include:
- New Messages: Show confirmation before sending.
- Mobile Messages: Show confirmation when sending from the mobile app.
- IPAWS Alerts: Require confirmation before sending IPAWS alerts.
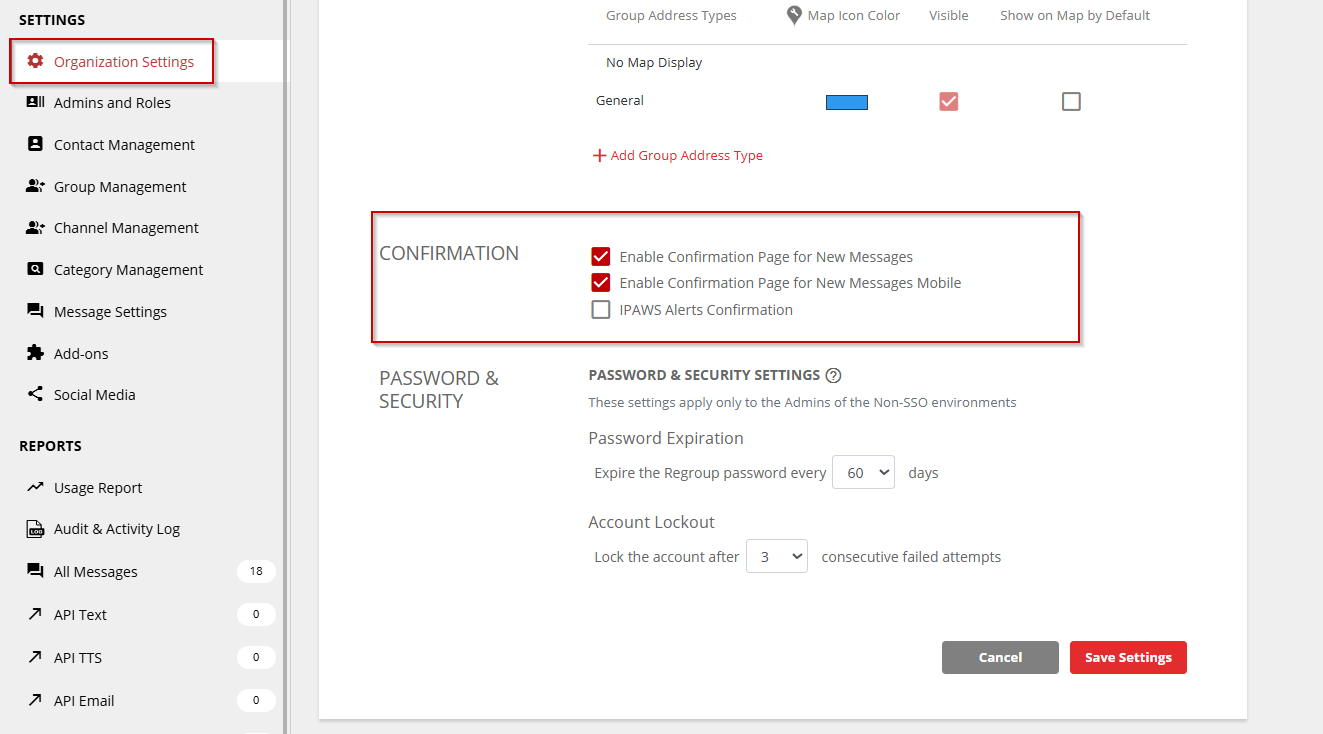
- Save your changes.
Tip: Summaries include message title, recipient count, and delivery methods.
Manage Password & Security Settings
- In the Password & Security section:
- Password Expiration:
- Enabled by default
- Non-SSO passwords expire every 60 days (configurable to 30 or 90 days).
- Admins receive reminders 10 days before expiration.
- New passwords cannot match the last three used.
- Inactive accounts (unused for one year) require a password reset on login.
- Password Expiration:
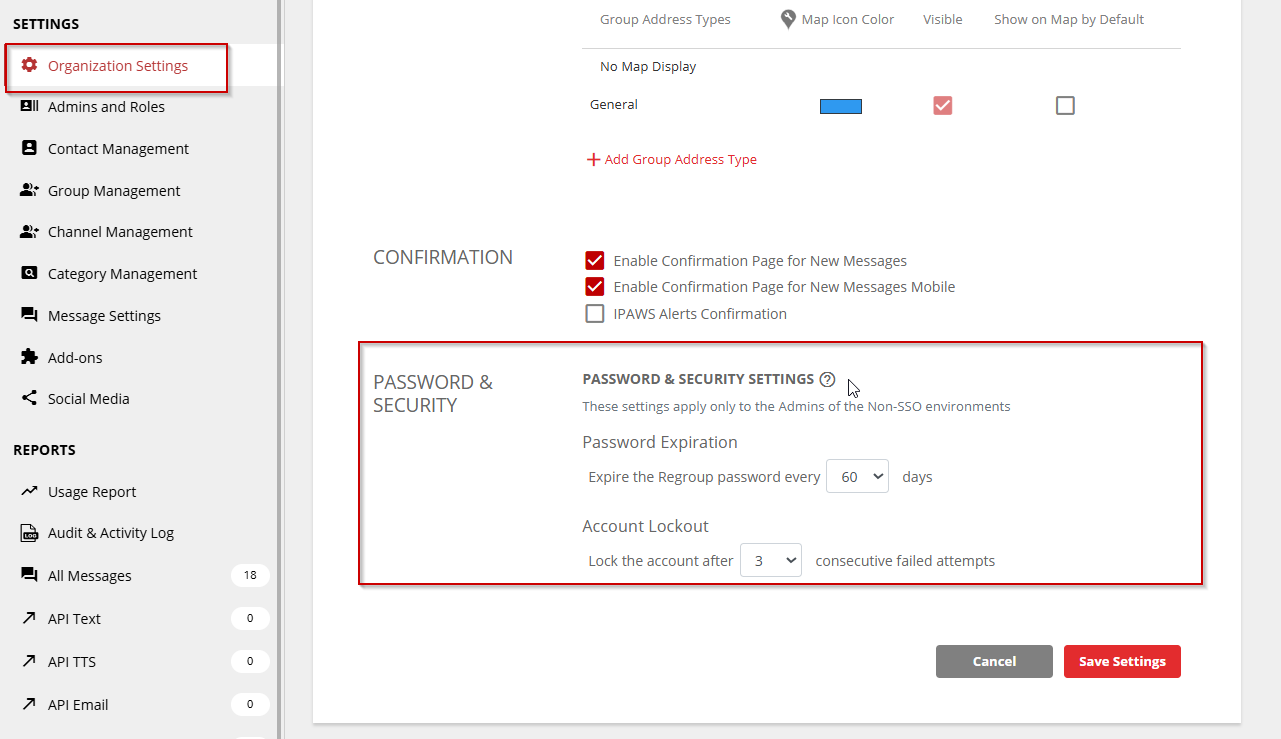
- Account Lockout:
- On the login screen, click Forgot Password.
- Select Email and enter your account’s email address.
- Check your inbox for the reset link and follow the instructions to create a new password.
- For more details, see Create or Reset Password to log into Regroup
- Save your changes
Saving Settings
Click Save Settings to apply changes. A confirmation message will appear once updates are successful.