You can add an individual asset manually or upload multiple assets at once using a CSV file. For details on adding multiple assets through a CSV file, see Upload Assets Using a CSV File.
To add an individual asset:
-
From the left navigation pane, click Assets.
-
On the Assets page, click + Add Asset.
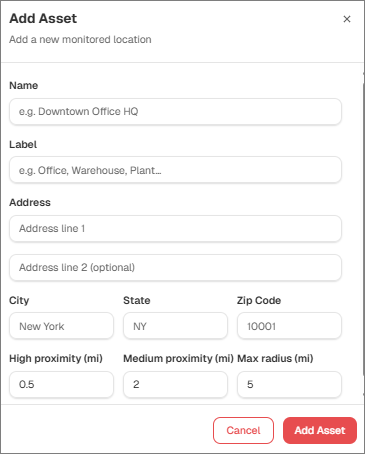
The Add Asset dialog is displayed.
-
On the Add Asset dialog, specify the following parameters:
-
Name: Enter a descriptive name for the asset, such as, Toronto Regional Office.
-
Label: Enter a label that identifies the type or group of asset, such as Office, Warehouse.
-
Address: Enter the primary street address.
-
Address line 2 – Enter additional address information, if applicable. This field is optional.
-
City: Enter the city.
-
State: Enter the state or province information.
-
Zip Code: Enter the ZIP or postal code.
-
High proximity (mi) – Specify the distance used for the high-proximity monitoring range. Proximity distance defines how close an alert must be to an asset location for Regroup Threat Intelligence to consider the alert relevant to that asset. High Proximity represents the closest monitoring zone around the asset and is used to identify alerts occurring nearest to the asset location.
-
Medium proximity (mi) – Specify the distance used for the medium-proximity monitoring range. Proximity distance defines how close an alert must be to an asset location for Regroup Threat Intelligence to consider the alert relevant to that asset.
Medium Proximity represents the intermediate monitoring zone around the asset. It is used to identify alerts that occur farther from the asset than the High Proximity zone but are still within the configured monitoring area.
- Max radius (mi) – Specify the maximum geographic radius within which the asset should be monitored.
-
-
Click Add Asset.
The new location is added to the Assets page.
Modify an Asset
You can modify the information and monitoring area configured for an existing asset.
-
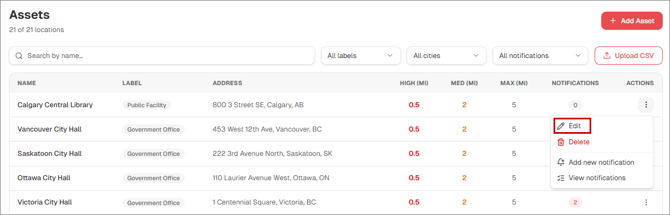
On the Assets page, locate the asset you want to modify.
-
Click the Actions (three-dot) icon.
-
From the popup menu, click Edit.
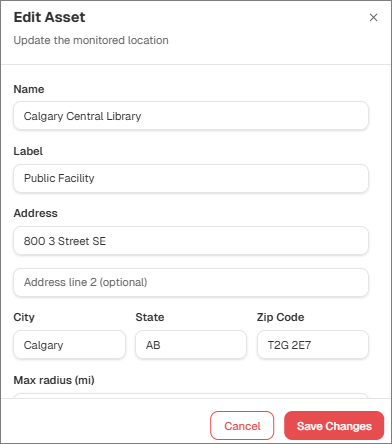
The Edit Asset dialog is displayed.
-
Update the asset information as needed. For details on the parameters, see the Step 3 in Add an Asset section.
Delete an Asset
You can delete an asset that your organization no longer needs to monitor.
-
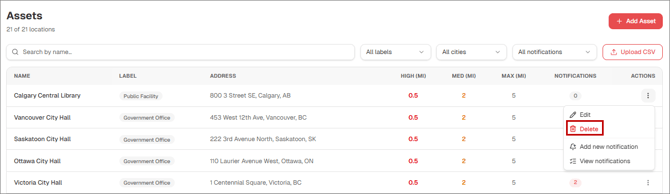
On the Assets page, locate the required asset.
-
Click the Actions (three-dot) icon.
-
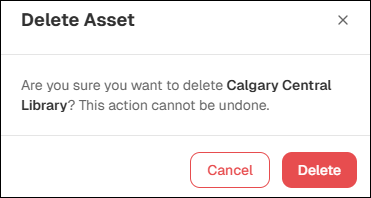
From the popup menu, click Delete.
-
Confirm the deletion when prompted.
The asset is removed from the Assets list.