
When creating a dashboard, you define the area of interest using either a specific address or a county. This determines the geographic area that the dashboard will monitor.
You can create multiple dashboards for different locations or areas that are important to your organization.
-
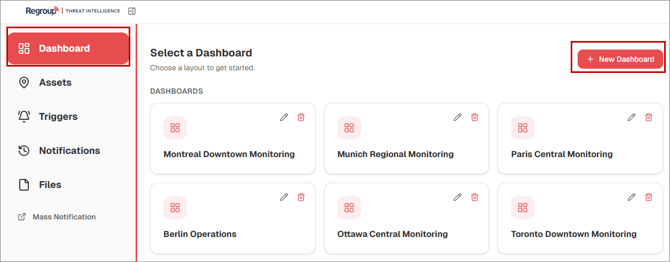
From the left navigation pane, click Dashboard.
-
On the Select a Dashboard page, click + New Dashboard in the upper-right corner.
The Create Dashboard dialog is displayed.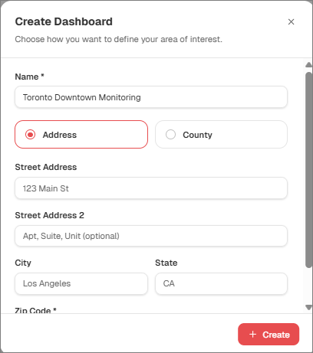
-
In the Name field, enter a name for the dashboard.
- Select how you want to define the dashboard's area of interest:
-
Address: Creates the dashboard for a specific street address.
When address is selected, specify the following details:
-
Street Address: Enter the street address for the location you want to monitor.
-
Street Address 2: Enter additional address information, such as an apartment, suite, or unit number. This field is optional.
-
City: Enter the city for the address.
-
State: Enter the state.
-
Zip Code: Enter the ZIP code for the address.
-
-
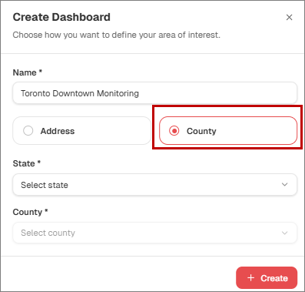
County: Creates the dashboard for a selected county.
-
State: Select the state that contains the county you want to monitor.
-
County: Select the county from the dropdown menu.
-
-
-
After completing the required information, click + Create. Regroup Threat Intelligence validates the location information and creates the dashboard using the specified address.
After the dashboard is created, it is added to the Select a Dashboard page. You can select the dashboard to open its workspace and monitor alerts associated with the configured geographic area. See the Dashboard Workspace topic for additional information.
Modify a Dashboard
You can modify an existing dashboard to update its name or geographic area.
To modify a dashboard:
-
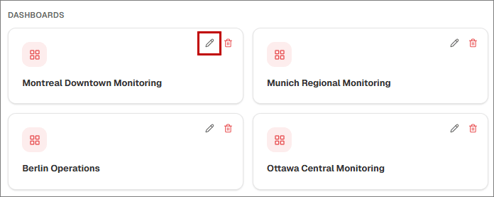
On the Select a Dashboard page, click the Edit (pencil) icon for the dashboard you want to modify.
-
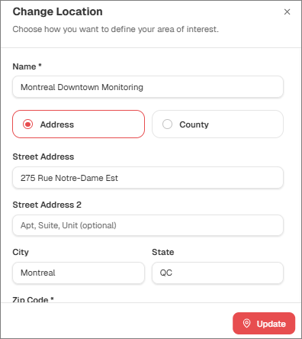
On the Change Location dialog, modify the dashboard name or location information as needed.
-
Click Update to save the changes.
Delete a Dashboard
You can delete a dashboard that you no longer need.
To delete a dashboard:
-
On the Select a Dashboard page, click the Delete (trash) icon for the dashboard you want to delete.
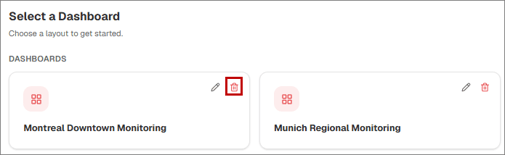
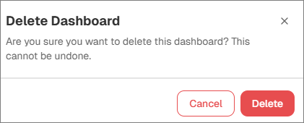
The Delete Dashboard confirmation dialog is displayed.
-
Click Delete to permanently remove the dashboard.
Note: Once deleted, the dashboard is removed from the dashboard list and cannot be restored.